This functionality is available for our Account Admins and Customer Admins.
Instead of adding buildings one by one, you can import multiple buildings into a facility by using the Import Wizard. All you need is a CSV or Excel file, containing the following information:
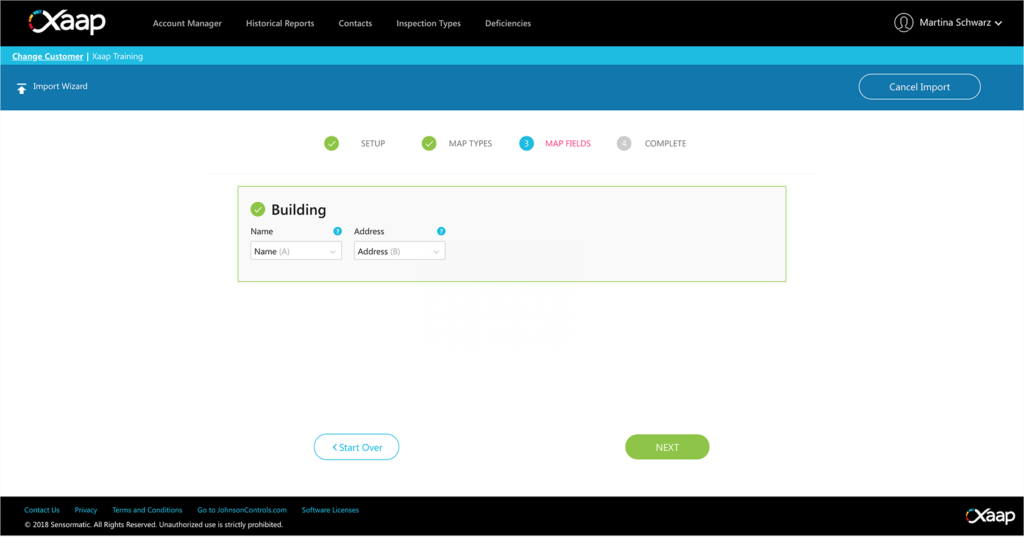
- The name of the building
- The address of the building
To make it even easier, you can download our sample file. Simply populate it with your data and upload it following the steps below:
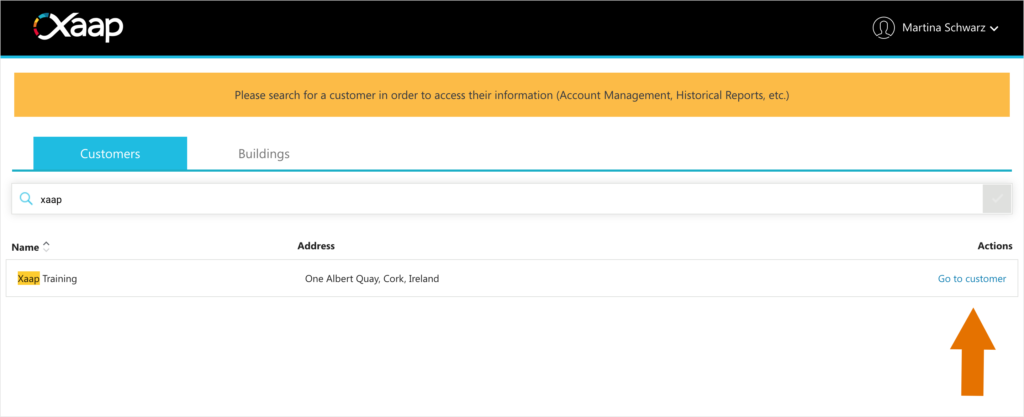
- If you haven’t already, log into the Xaap Inspections web application.
- Find the customer you want to import buildings to and click ‘Manage’.
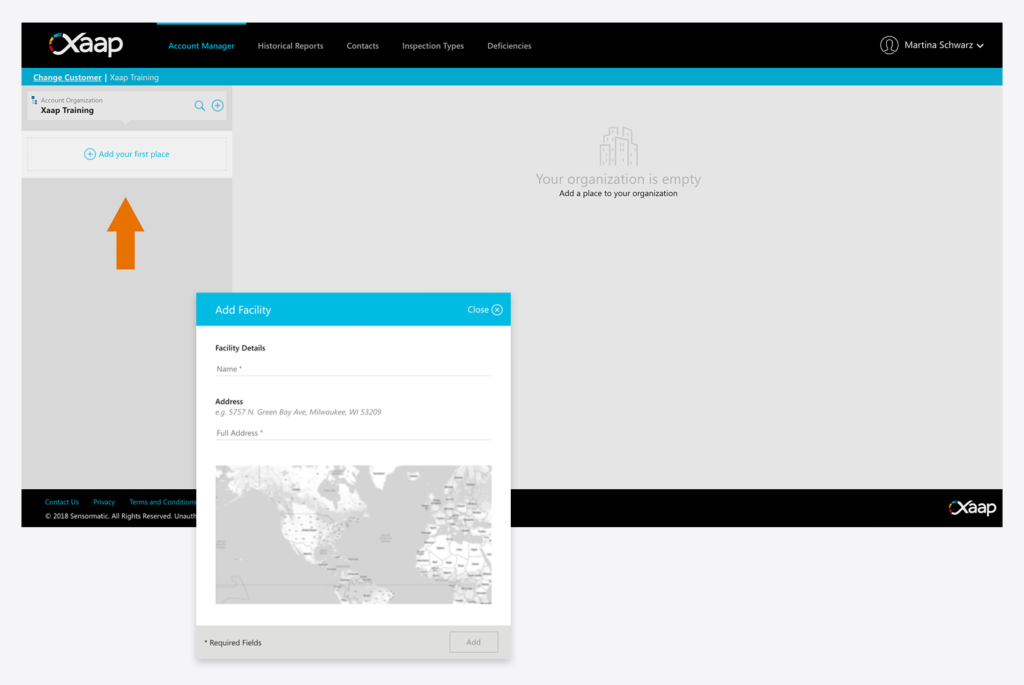
- In the Account Organization panel on the left, select the facility you want to add your buildings to.
If you haven’t created a facilty yet, click the ‘Add your first place’ button and fill in the required information.

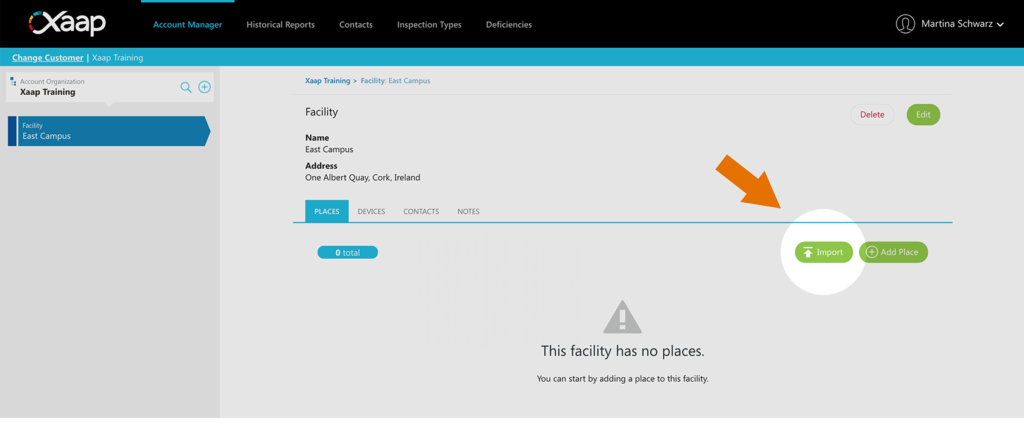
- Once you have selected your facilty, click the ‘Import’ button under the ‘Places’ tab to get to our Import Wizard.
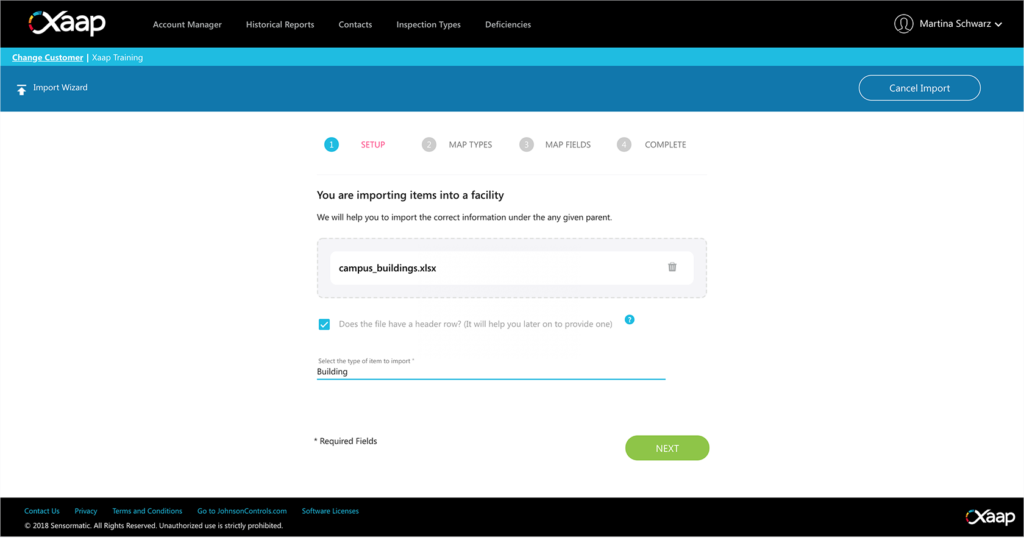
- Upload your CSV file and select the item type. If your file has a header row – if you are using our sample file, it does! – make sure to tick the checkbox, as this will help you identify the information contained in each column throughout the import process, by using the header labels in the document. Then, click ‘Next’.
- Map the columns of your import document to the attributes needed to create the buildings and click ‘Next’.
- Once the import process in done, you can click ‘Finish’. You will find all your imported buildings in the building list of your facility!