Watch the video below or skip to the step by step instructions.
Add a Signature
To top
Add a Signature
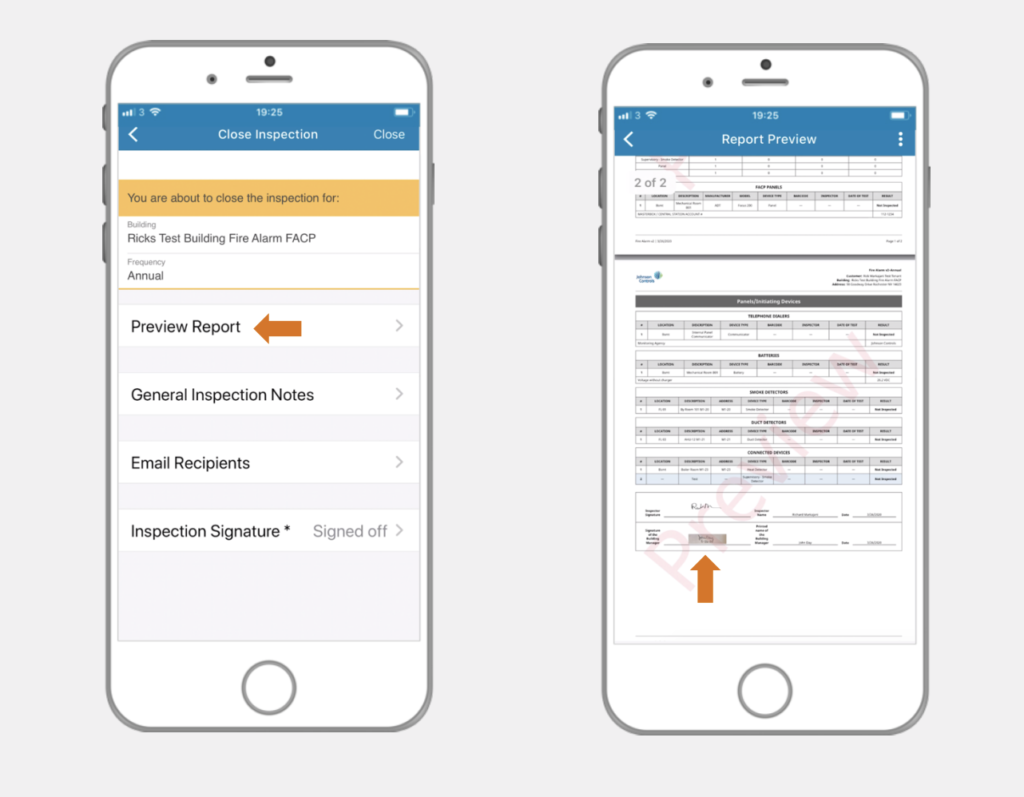
To topIn your inspection, click the main menu icon in the top left corner of the screen. Choose the ‘Report’ option and then click ‘Close Inspection & Generate Report’. Then click the ‘Inspection Signature’ button.
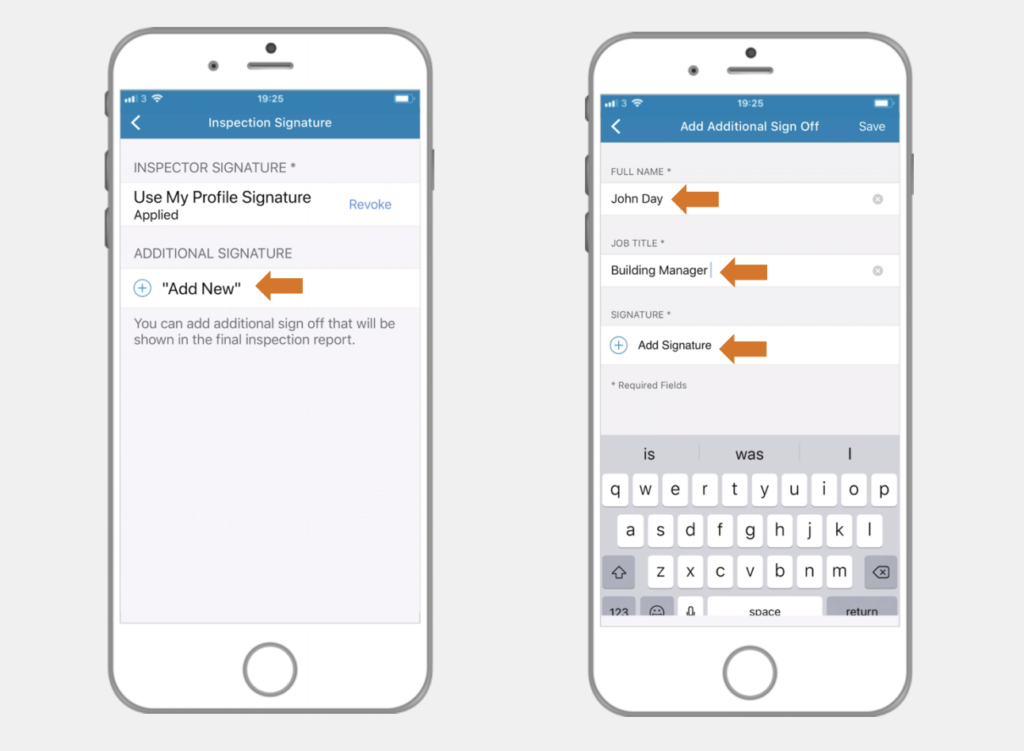
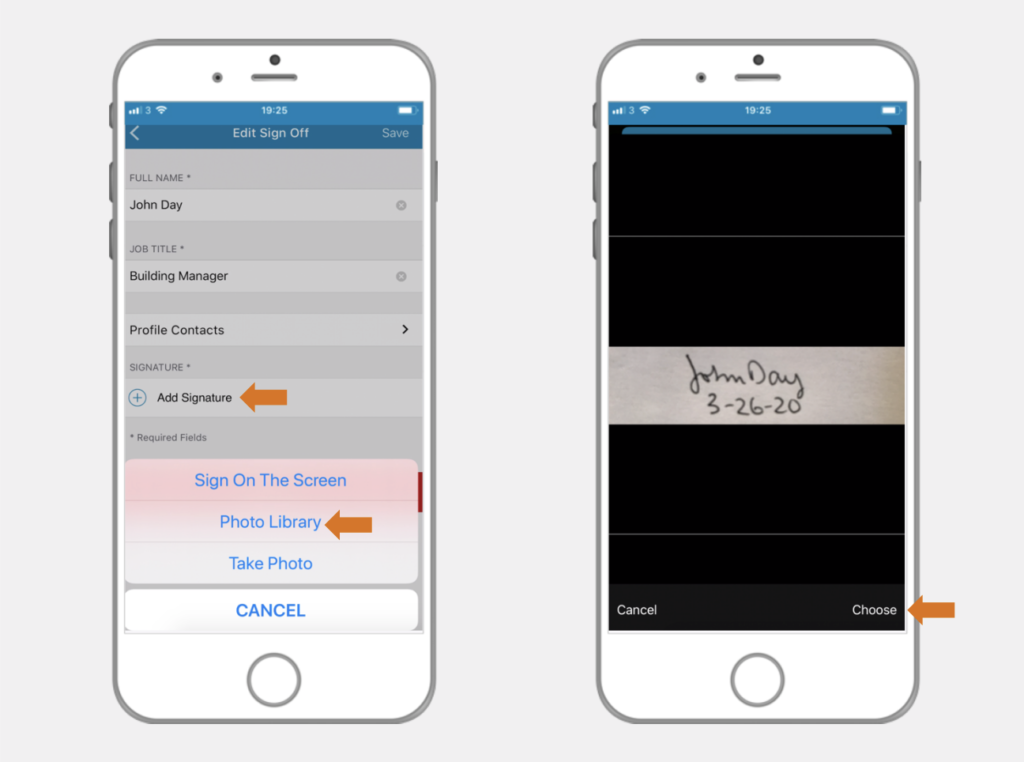
Click on ‘Add New’. Enter a name and job title, then click ‘Add Signature’. You will be presented with two different options for photo signatures: take a new photo or choose one from your library.
Take a New Photo
To top
Take a New Photo
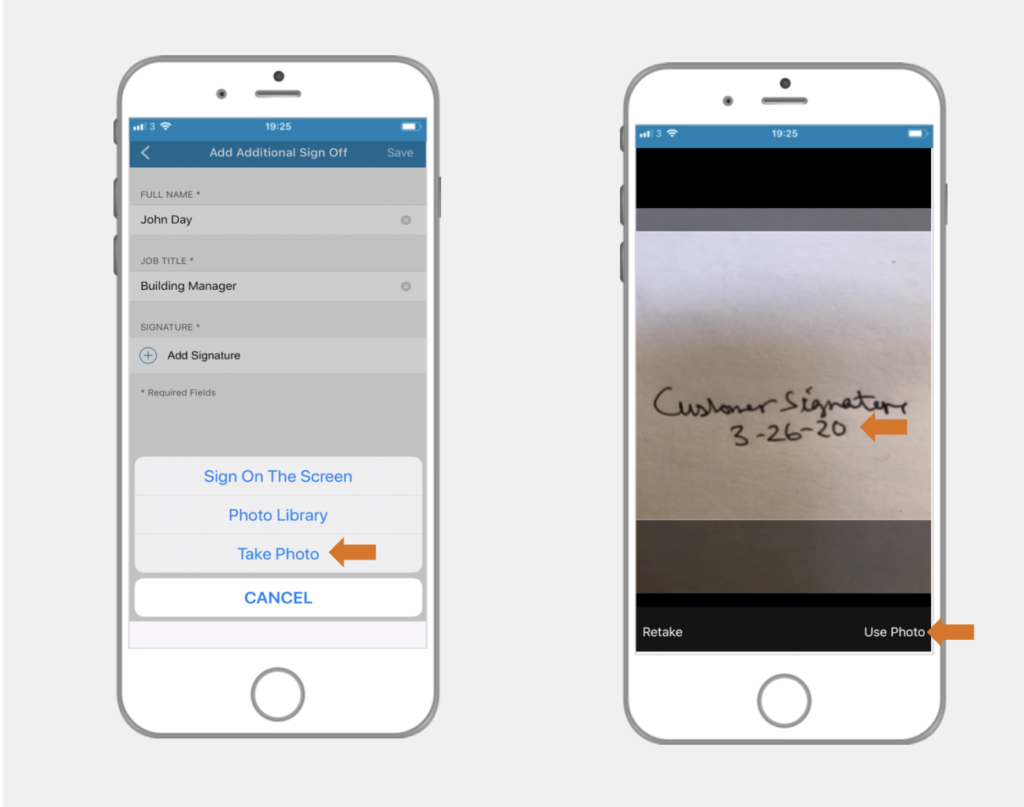
To topIf the customer or the contact you need a signature from isn’t able to or doesn’t want to sign on screen, you can choose the ‘Take Photo’ option. This will open the camera on your phone and you can take a picture of the signature supplied to you. When you’re happy with your photo, click on ‘Use Photo’.
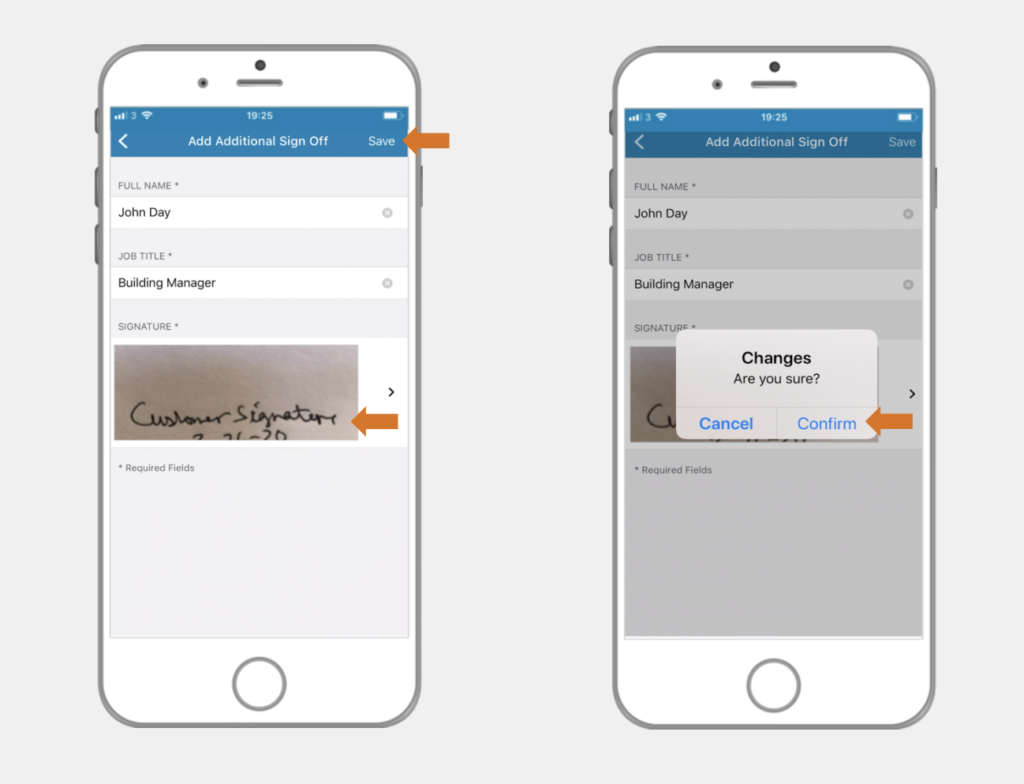
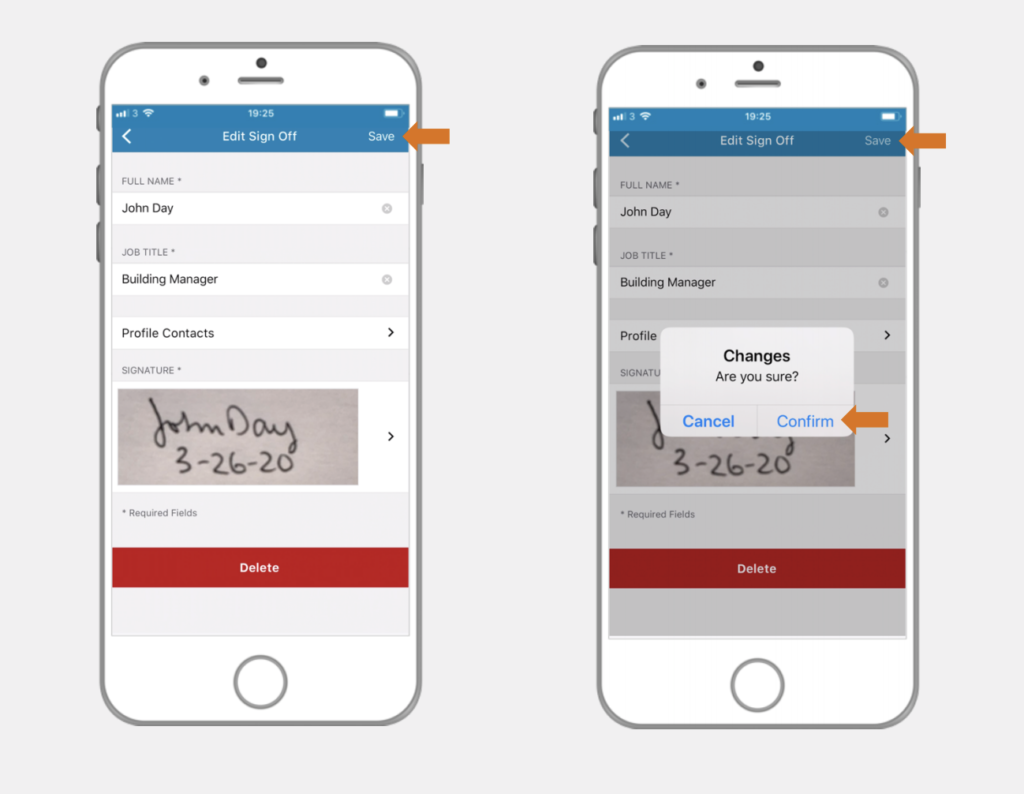
The picture will then appear in the ‘Signature’ field. Click ‘Save’ in the top right corner and confirm.
Use a Photo from your Library
To top
Use a Photo from your Library
To topThe other option is to choose an existing photo from your library. In the pop-up menu, click the ‘Photo Library’ button. Browse your library and select a picture. Click on ‘Choose’.
The picture will then appear in the ‘Signature’ field. Click ‘Save’ in the top right corner and confirm.
Preview Report Signature
To top
Preview Report Signature
To topOnce the signature is saved you can preview your report. Scroll to the bottom of the report and you will see the picture of the signature you selected.