Join an Existing Inspection to View List of All Devices
To top
Join an Existing Inspection to View List of All Devices
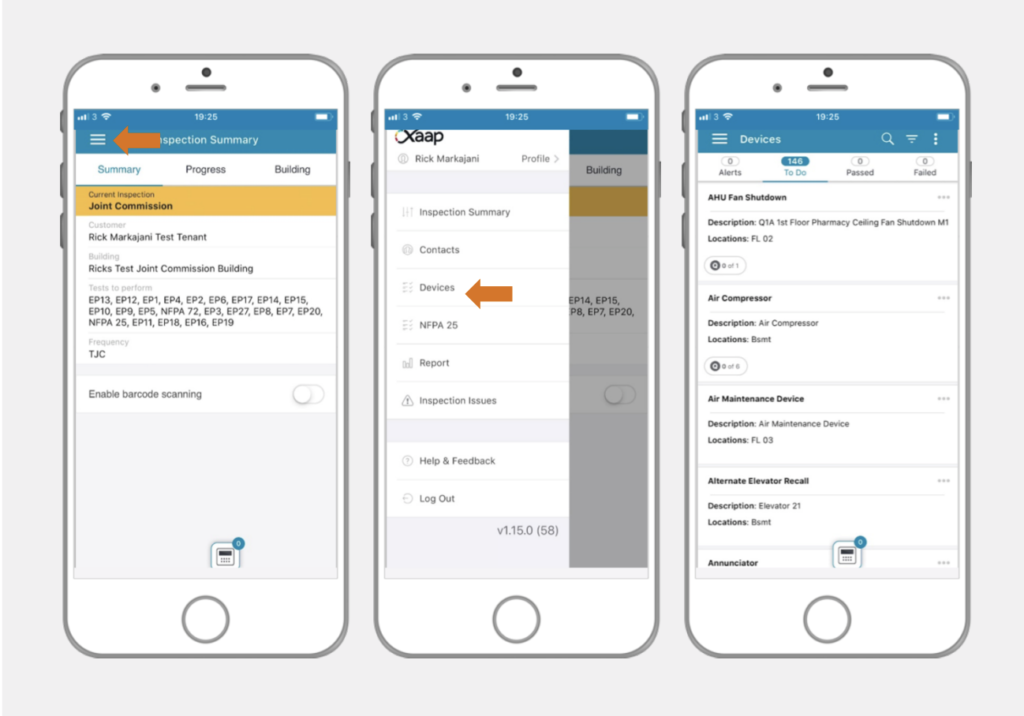
To topGo to the main screen and click on the top left navigation. Click on ‘Devices’.
Change Status
To top
Change Status
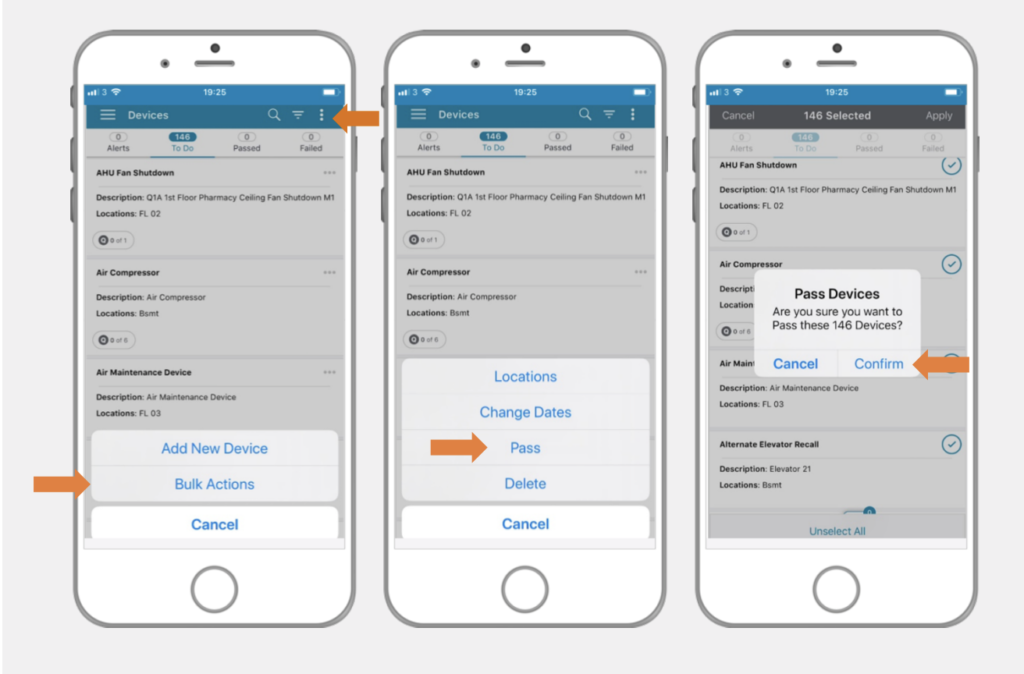
To topMake sure you have the To-Do bucket selected.
Click on the three-dots-menu icon in the top right corner to launch the popup menu. Click on ‘Bulk Actions’.
Click on ‘Pass’. You can select devices individually by clicking on the circular check mark icons on the righthand side or click ‘Select All’ to select all devices in your To-Do bucket. Then click ‘Apply’. In the confirmation modal click ‘Confirm’ (answer all questions for ‘Passed’ devices prior to printing out reports).
Undo Changes – Optional
To top
Undo Changes – Optional
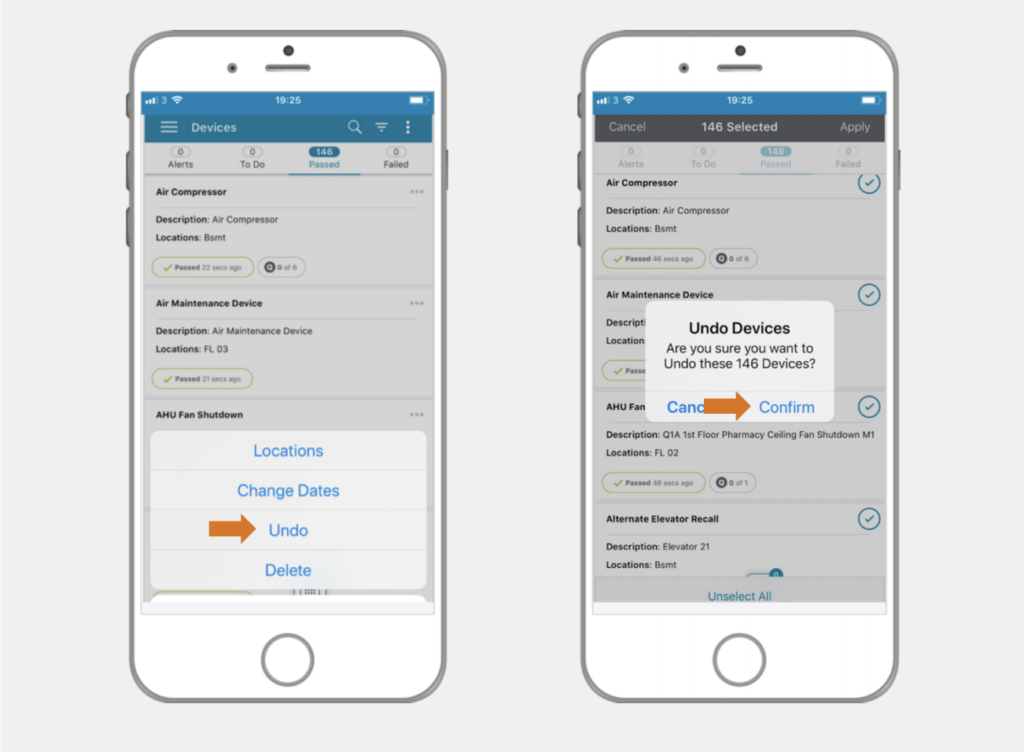
To topNavigate to the Passed bucket.
Click on the three-dots-menu icon in the top right corner to launch the popup menu. Click on ‘Bulk Actions’.
Click on ‘Undo’. Then click ‘Confirm’ to revert the passed devices back to their default state.
Change Inspection Date
To top
Change Inspection Date
To topClick on the three-dots-menu icon in the top right corner to launch the popup menu. Click on ‘Bulk Actions’.
Click on ‘Change Dates’. You can select devices individually by clicking on the circular check mark icons on the righthand side or click ‘Select All’ to select all devices in the current bucket. Then click ‘Apply’. In the next screen, select ‘Status Date’. Set a new date value and then click on ‘Done’.
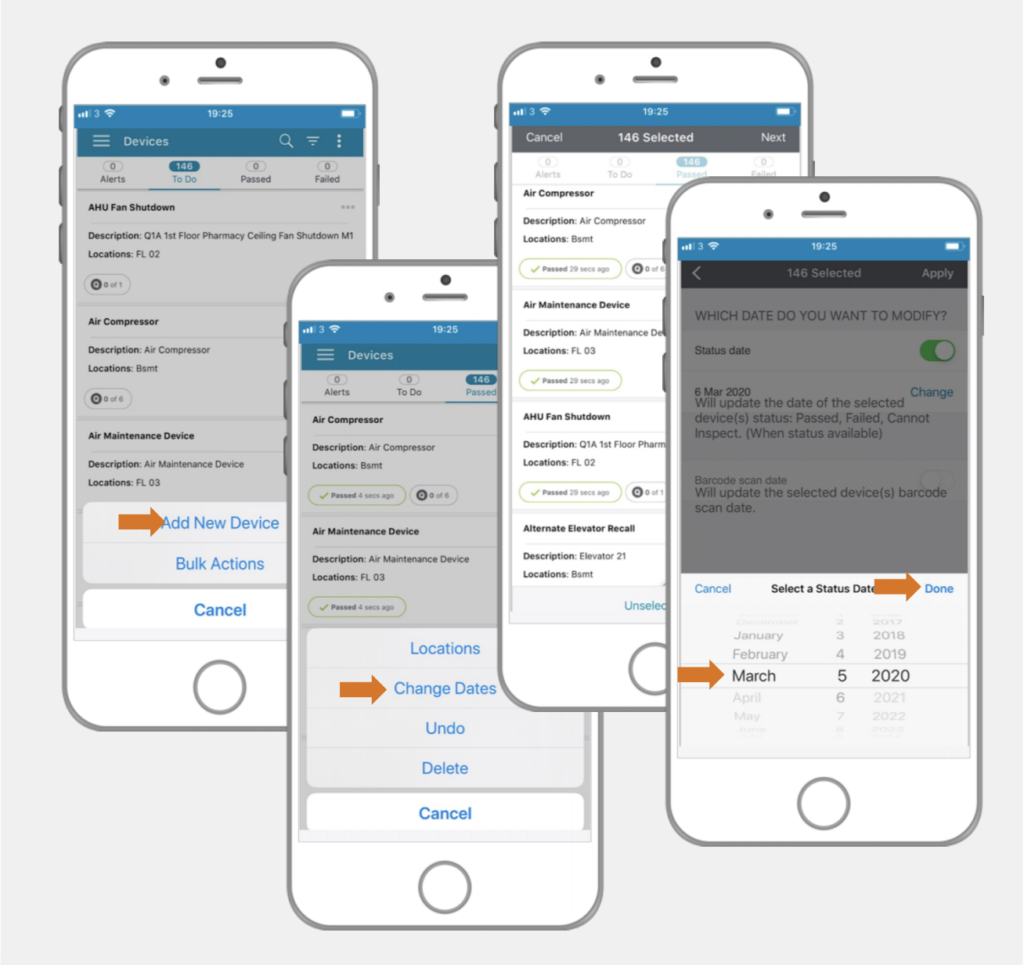
Click the main menu icon in the top left corner. Select the ‘Report’ option.
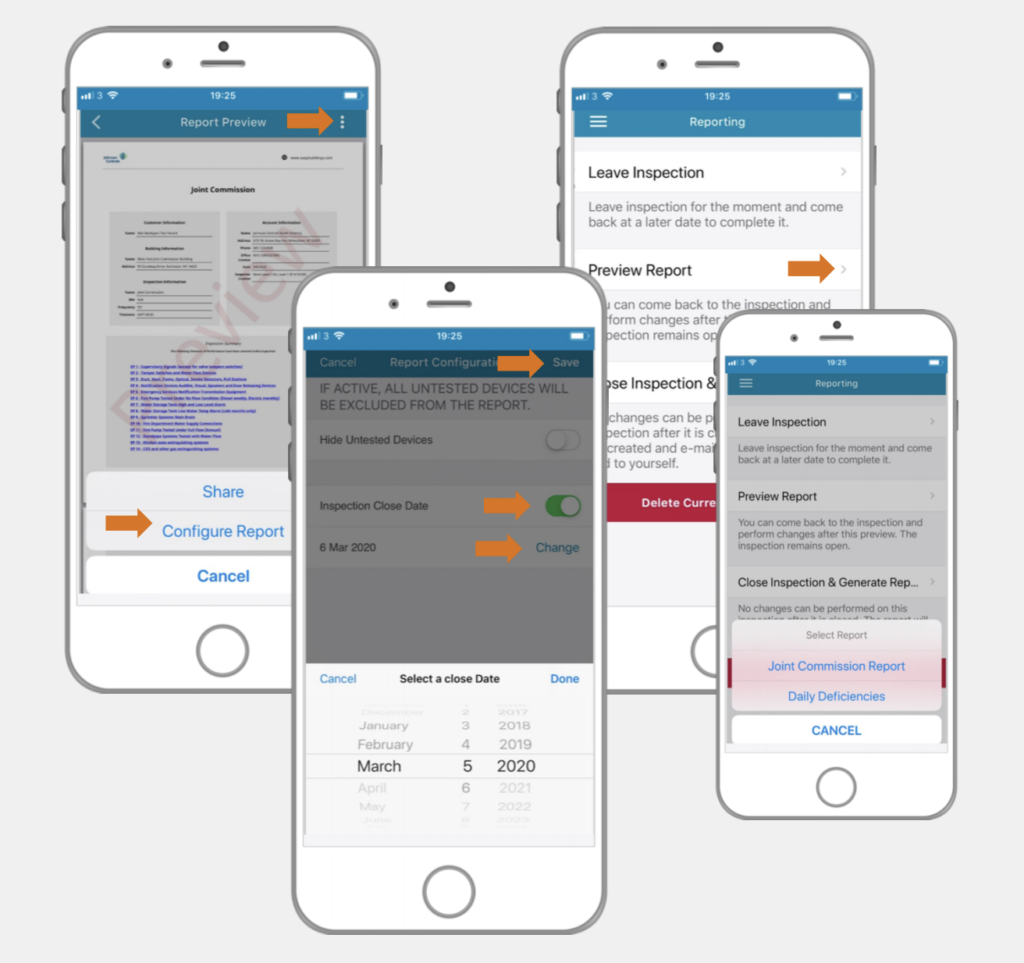
Click on ‘Preview Report’. Verify the date changes in the generated report (look for the ‘Date of Test’ field value).

You also have the option to change the inspection date on a report from this screen. Click on the three-dots-menu icon in the top right corner. Then click on ‘Configure Report’ and select the ‘Inspection Close Date’. Click on ‘Change Date’. Choose the new date and then click ‘Save’. Verify your changes by previewing the report.
Assign Locations
To top
Assign Locations
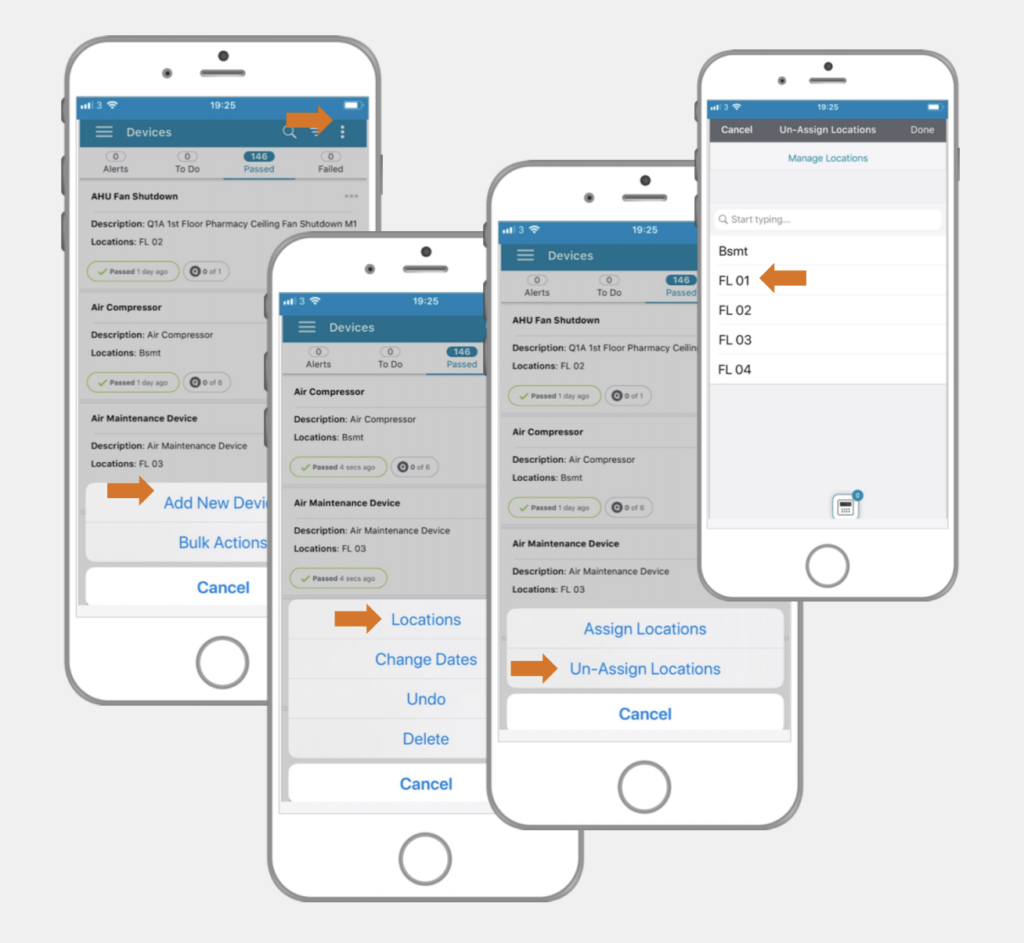
To topClick on the three-dots-menu icon in the top right corner to launch the popup menu. Click on ‘Bulk Actions’.
Click on ‘Locations’, then select ‘Assign Locations’. You can select devices individually by clicking on the circular check mark icons on the righthand side or click ‘Select All’ to select all devices in the current bucket. Then click ‘Next’. Select the location you wish to assign and then click ‘Done’.

Un-Assign Locations
To top
Un-Assign Locations
To topClick on the three-dots-menu icon in the top right corner to launch the popup menu. Click on ‘Bulk Actions’.
Click on ‘Locations’, then select ‘Un-Assign Locations’. You can select devices individually by clicking on the circular check mark icons on the righthand side or click ‘Select All’ to select all devices in the current bucket. Then click ‘Next’. Select the location you wish to un-assign and then click ‘Done’.
Delete
To top
Delete
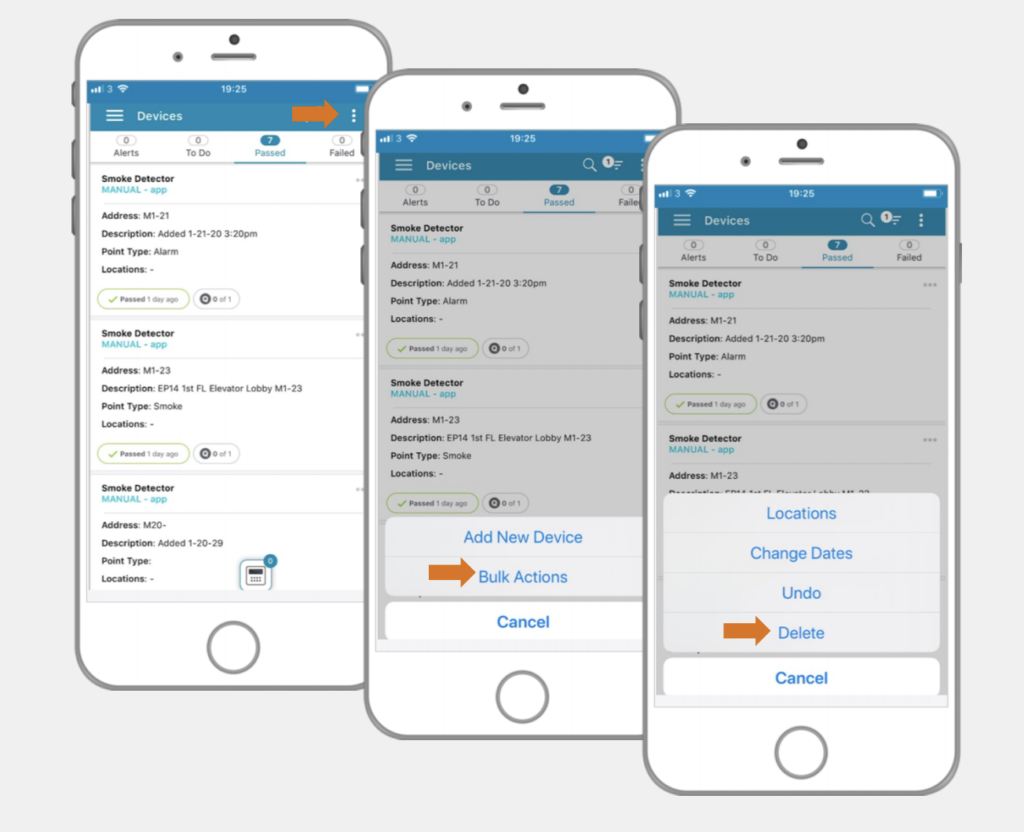
To topClick on the Filter icon (the three descending bars next to the three-dots-menu icon) in top right corner. Click on ‘Filter by Device Type’ and selecta device (in our example we use the Smoke Detector type). Click ‘Done’, then click ‘Apply’.
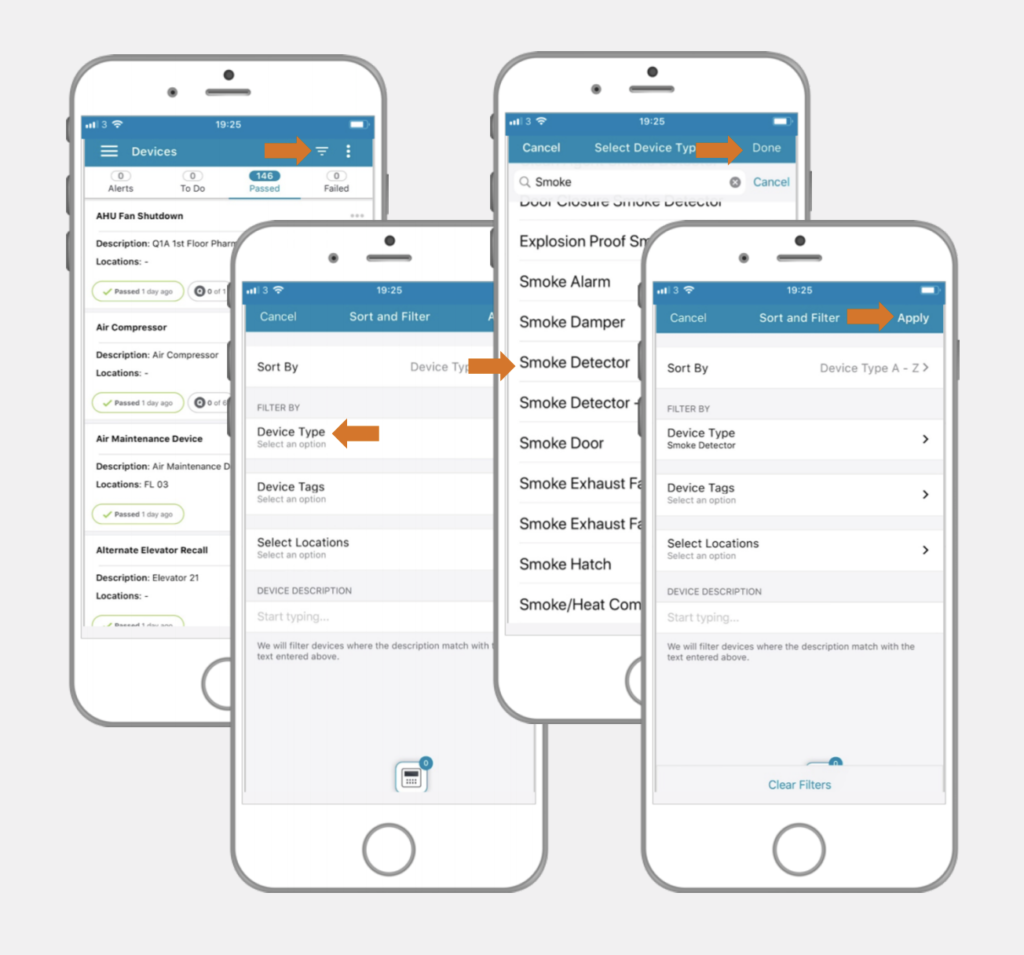
Review list of Smoke Detectors.
Click on the three-dots-menu icon in the top right corner to launch the popup menu. Click on ‘Bulk Actions’.
Click on ‘Delete’. You can select devices individually by clicking on the circular check mark icons on the righthand side or click ‘Select All’ to select all devices in the current bucket. Then click ‘Apply’ and confirm in the modal to delete the selected devices permanently.