Watch the video below or skip to the step by step instructions.
Close the Inspection
To top
Close the Inspection
To topIn your inspection, click the main menu icon in the top left corner of the screen. Choose the ‘Report’ option.
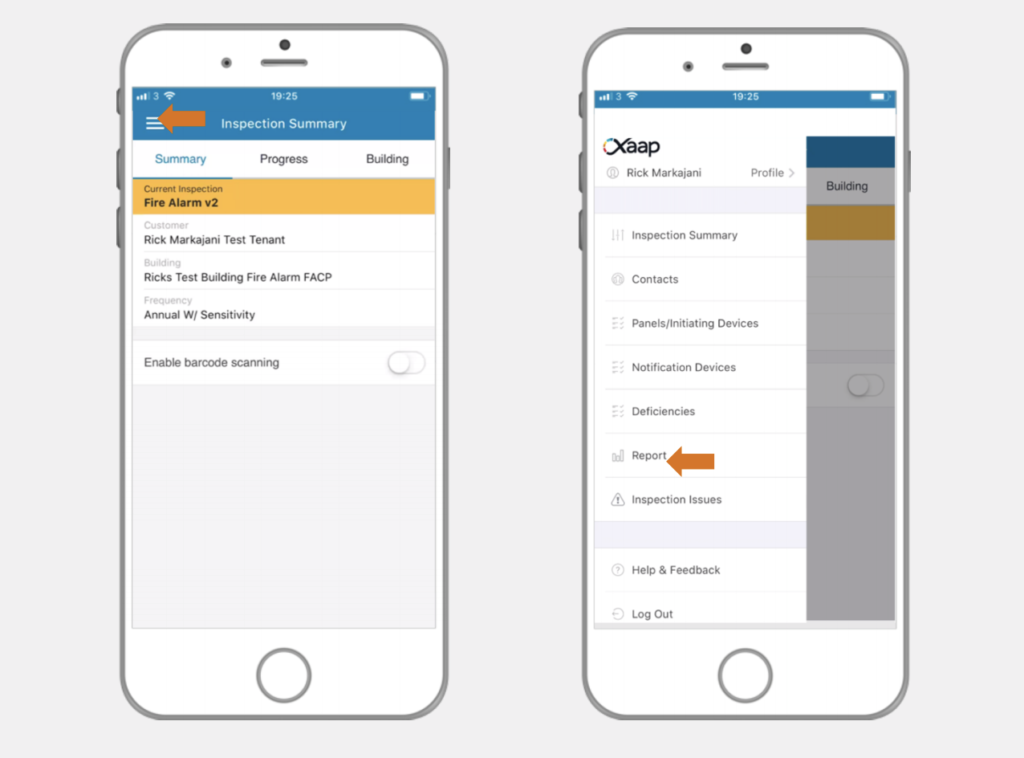
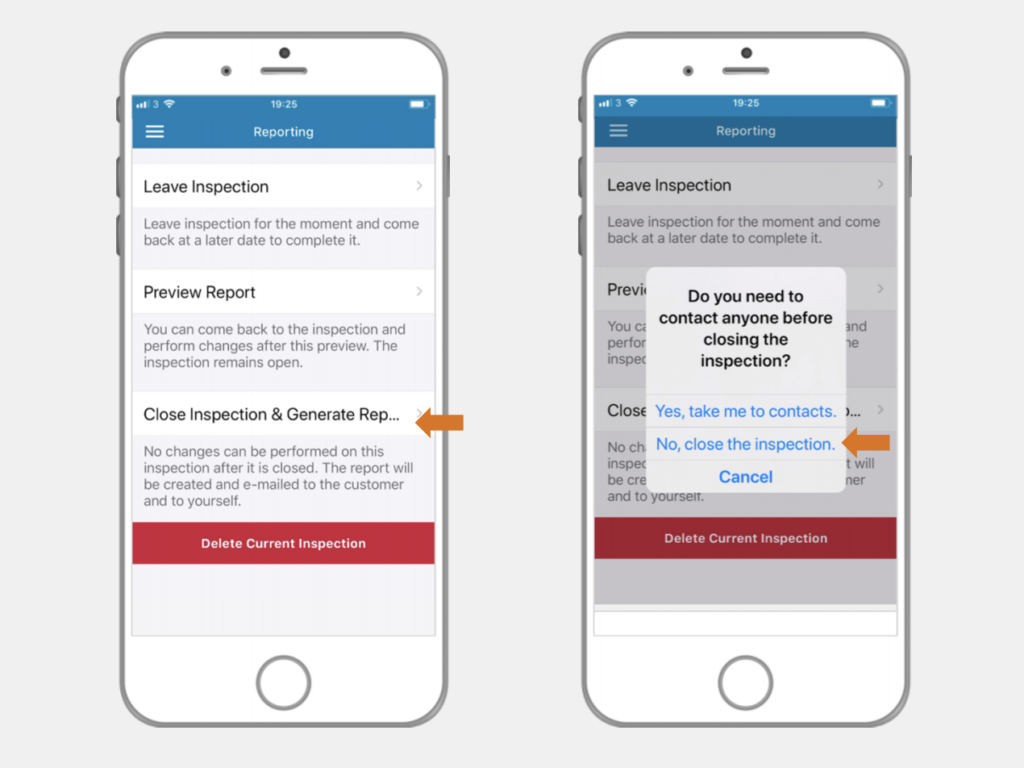
Click ‘Close Inspection & Generate Report’ and select ‘No, close the inspection.’ in the pop-up modal.
Add Inspection Signature
To top
Add Inspection Signature
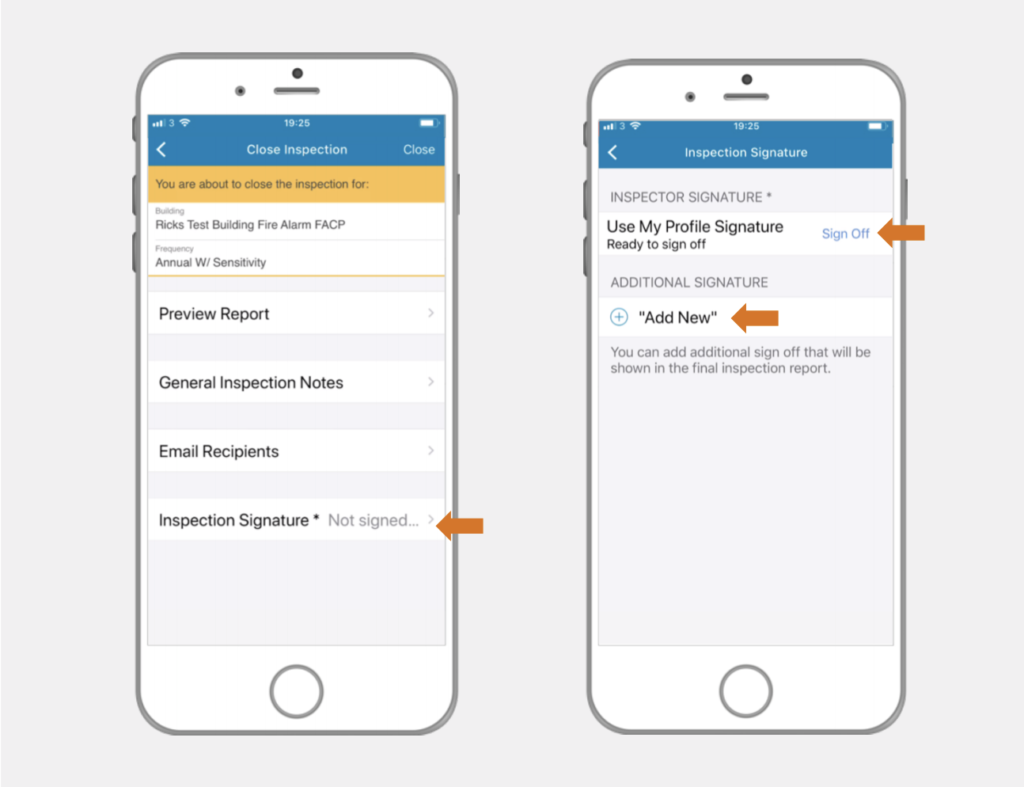
To topAt the bottom of the screen, click the ‘Inspection Signature’ button. In the next screen, choose the ‘Use My Profile Signature’ option and click on ‘Sign Off’.
To add additional names, click ‘Add New’.
Add Additional Inspector Signatures
To top
Add Additional Inspector Signatures
To topYou can add additional inspector signatures, or customer signatures.
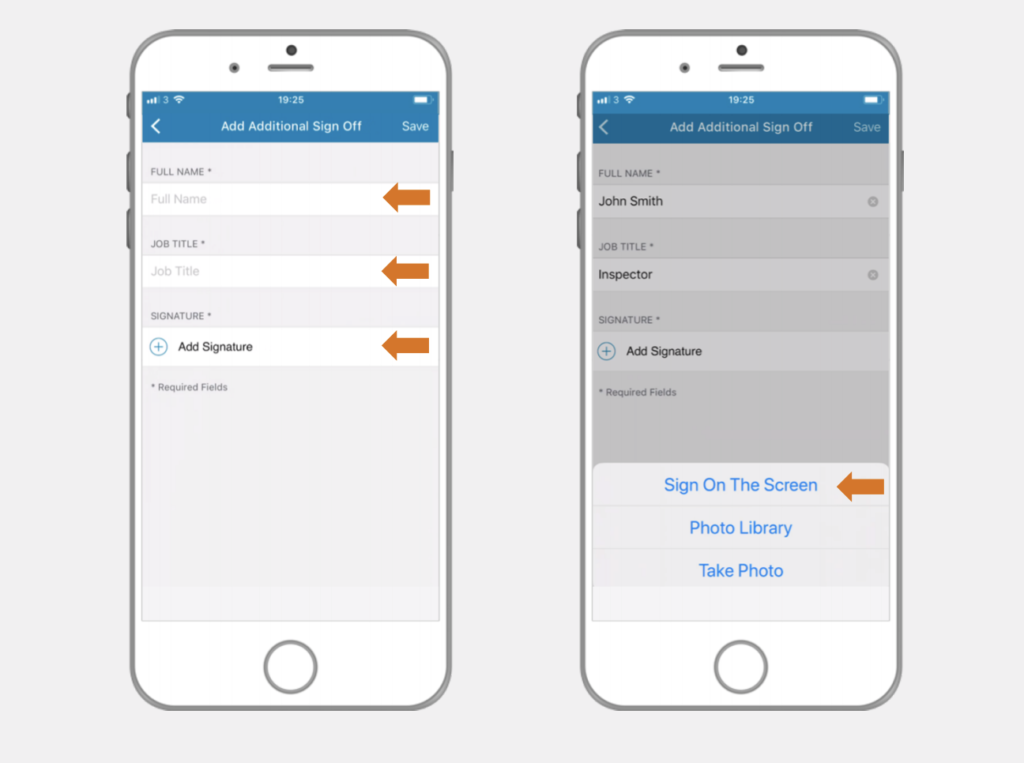
After clicking ‘Add New’, enter the Full Name and Job Title, and click ‘Add Signature’. Choose the ‘Sign On The Screen’ option to add the signature.
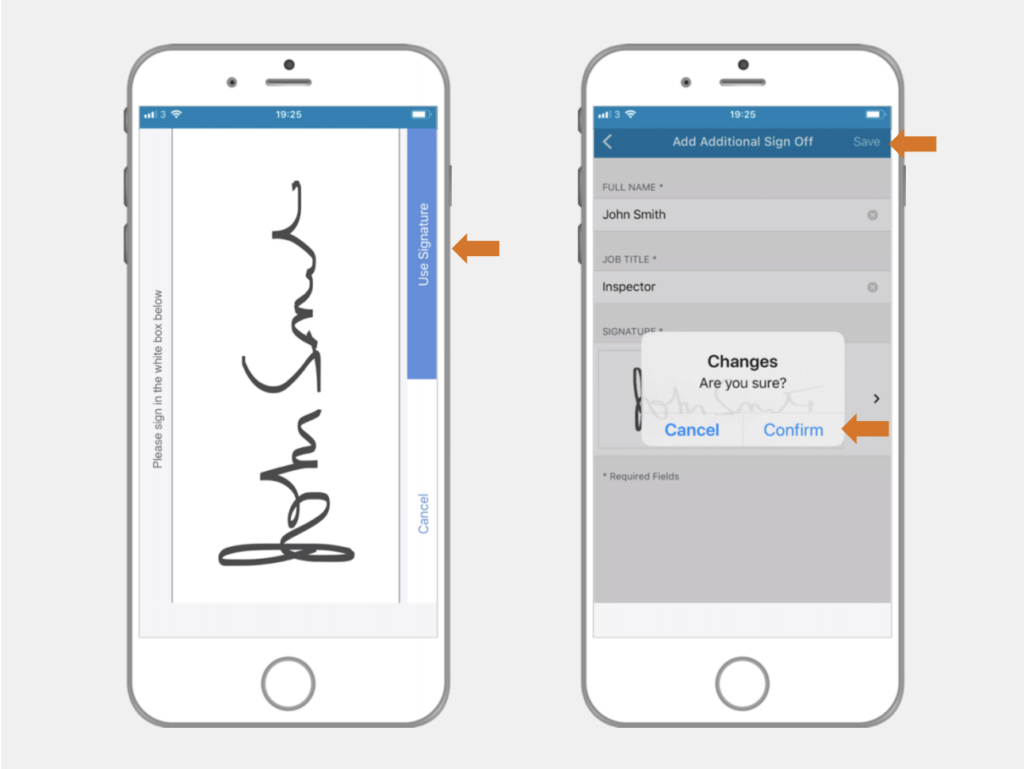
Sign your name on the screen and once you’re happy with it, select ‘Use Signature’. Then click ‘Save’ and ‘Confirm’.
Add Manual Signature
To top
Add Manual Signature
To topYou can also skip the digital signature, if your customer would rather sign the report manually.
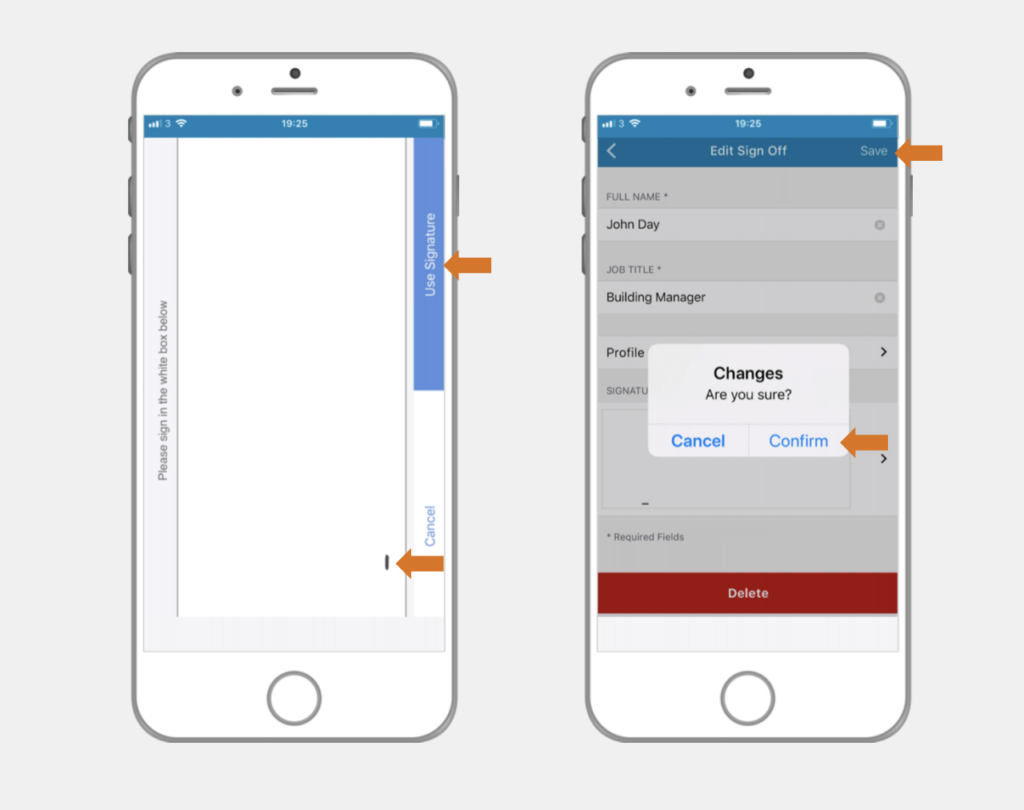
Follow the previous steps to add a signature. Instead of signing in the box, draw a small black line above cancel and select ‘Use Signature’. Click ‘Save’ and ‘Confirm’. This will create a blank space in the report where your customer can sign manually.
Preview Report
To top
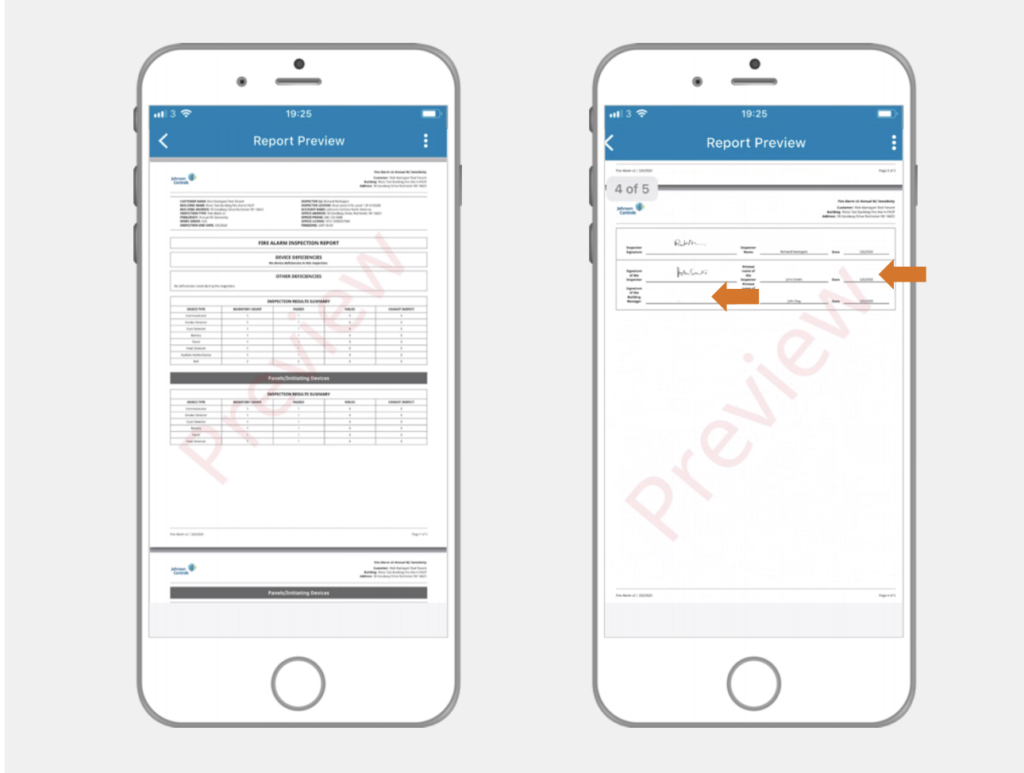
Preview Report
To topGo back to the ‘Close Inspection’ screen and click on ‘Preview Report’. Scroll to the bottom of your report to view the electronic signatures with all the information provided. If you created a report with the manual signature option, you will see the space provided.