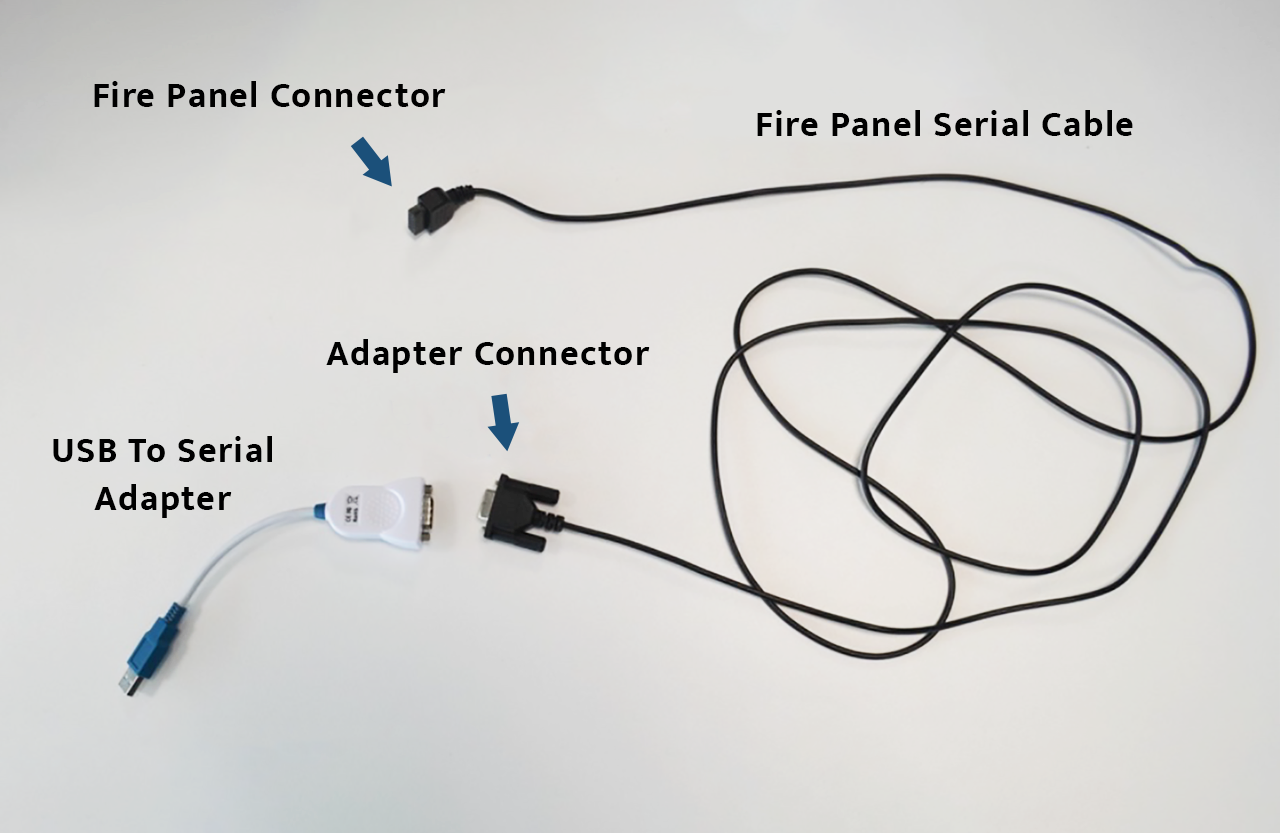
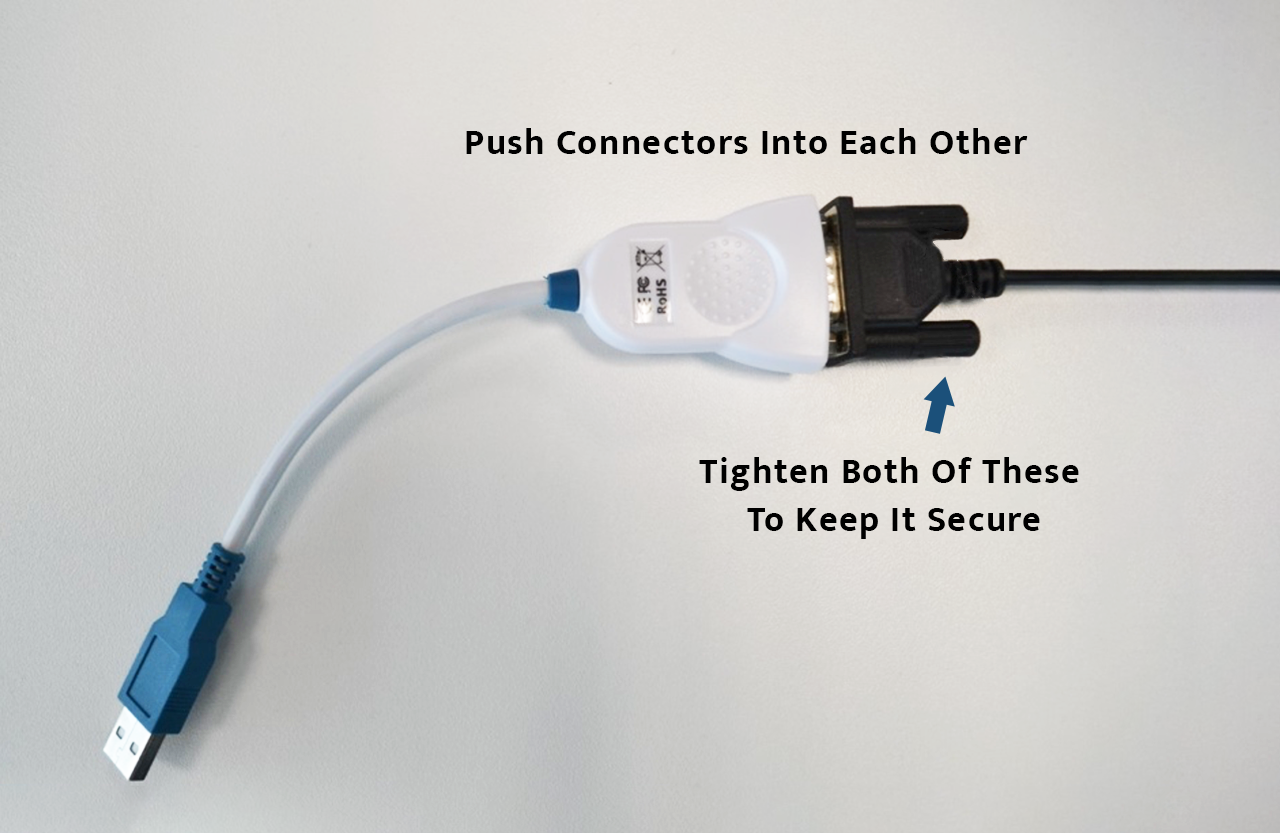
In order to connect the gateway to a fire panel, you need the USB to Serial adapter which you connect to one end of the fire panel serial cable as shown in the images below (see Figures 1a & 1b).
|
|
The USB end can be plugged into any of the available USB ports on the gateway. It is strongly recommended that you connect the gateway to the fire panel before you power it on. If you inadvertently connect to the fire panel with the gateway powered on, we suggest that you reset the fire panel to ensure there are no communication problems between the gateway and the panel.
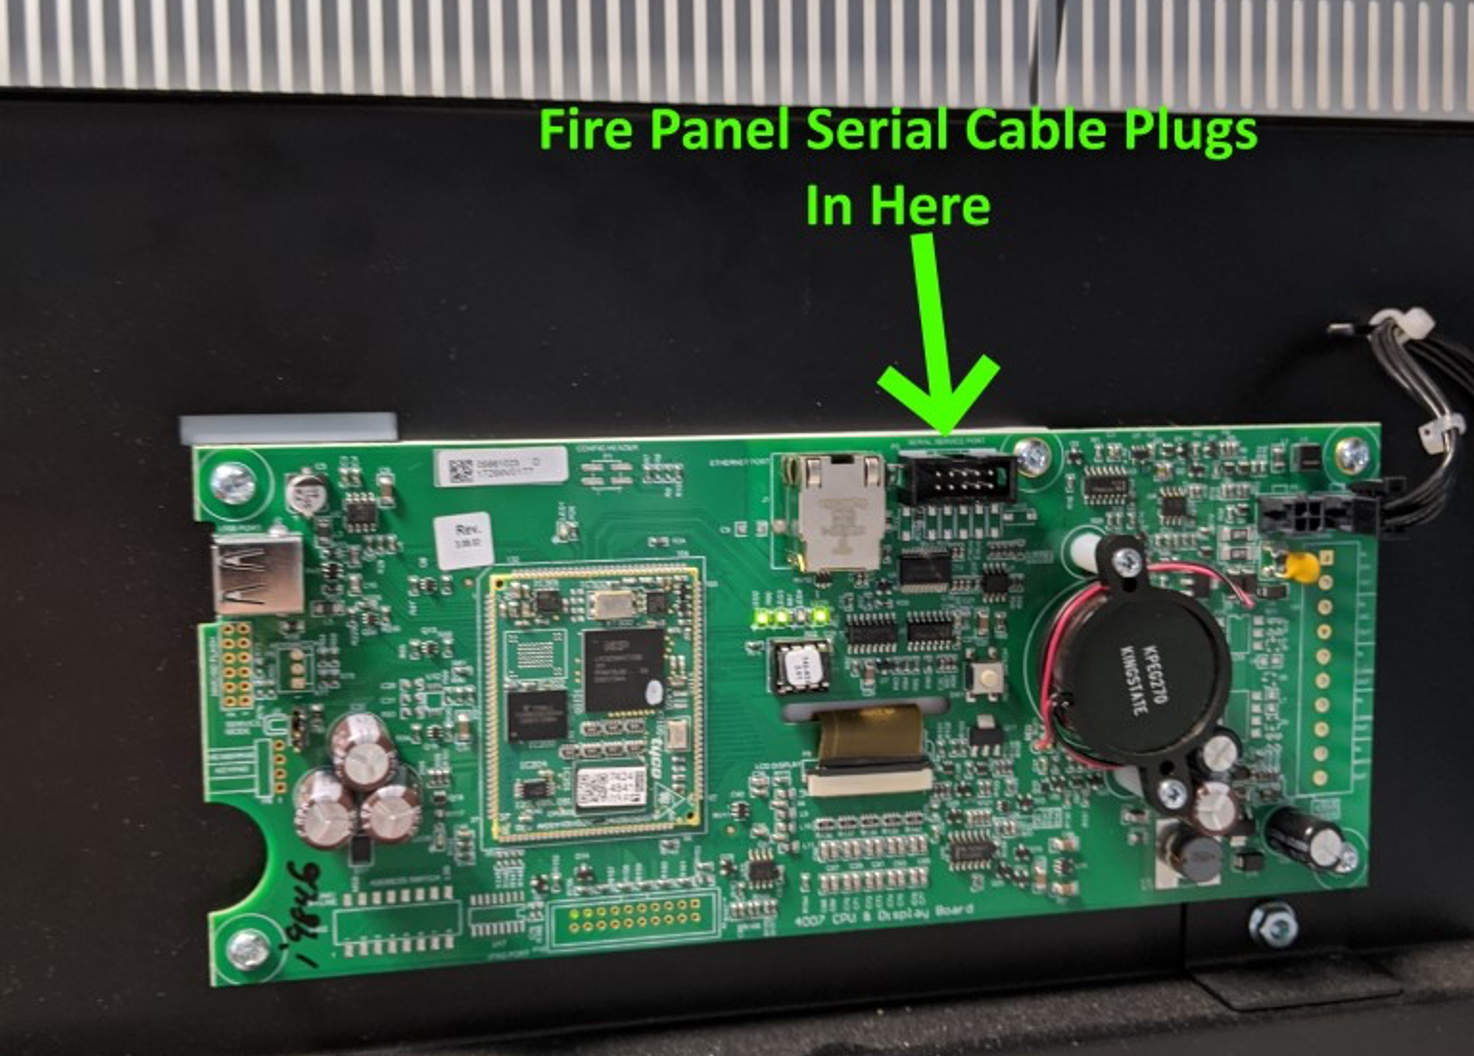
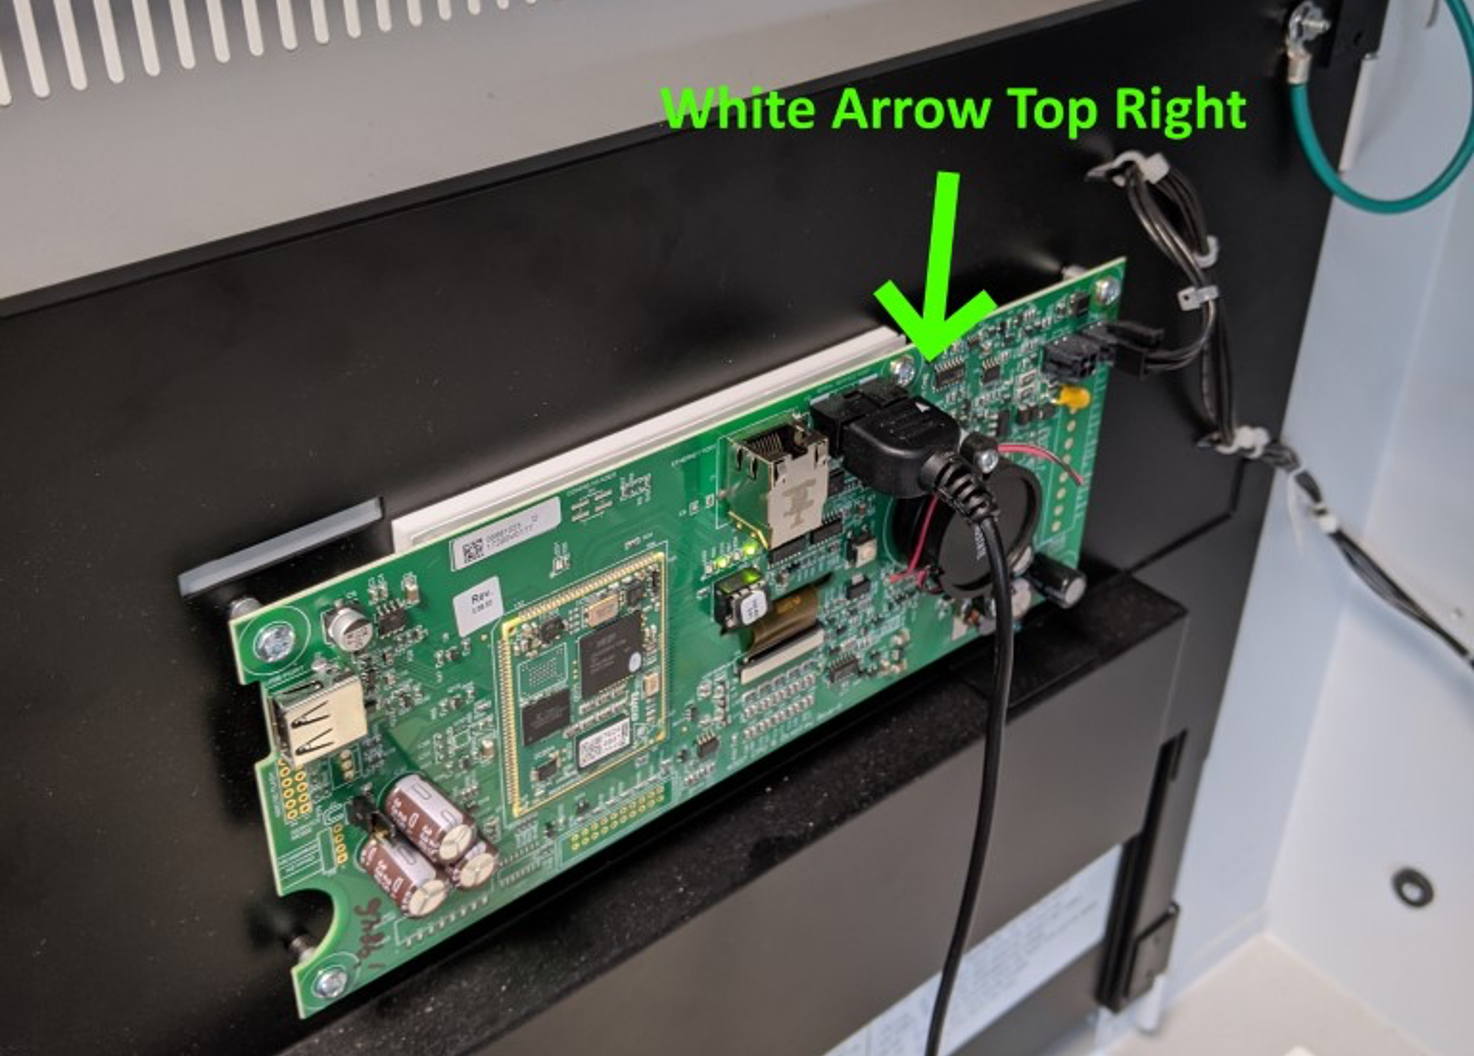
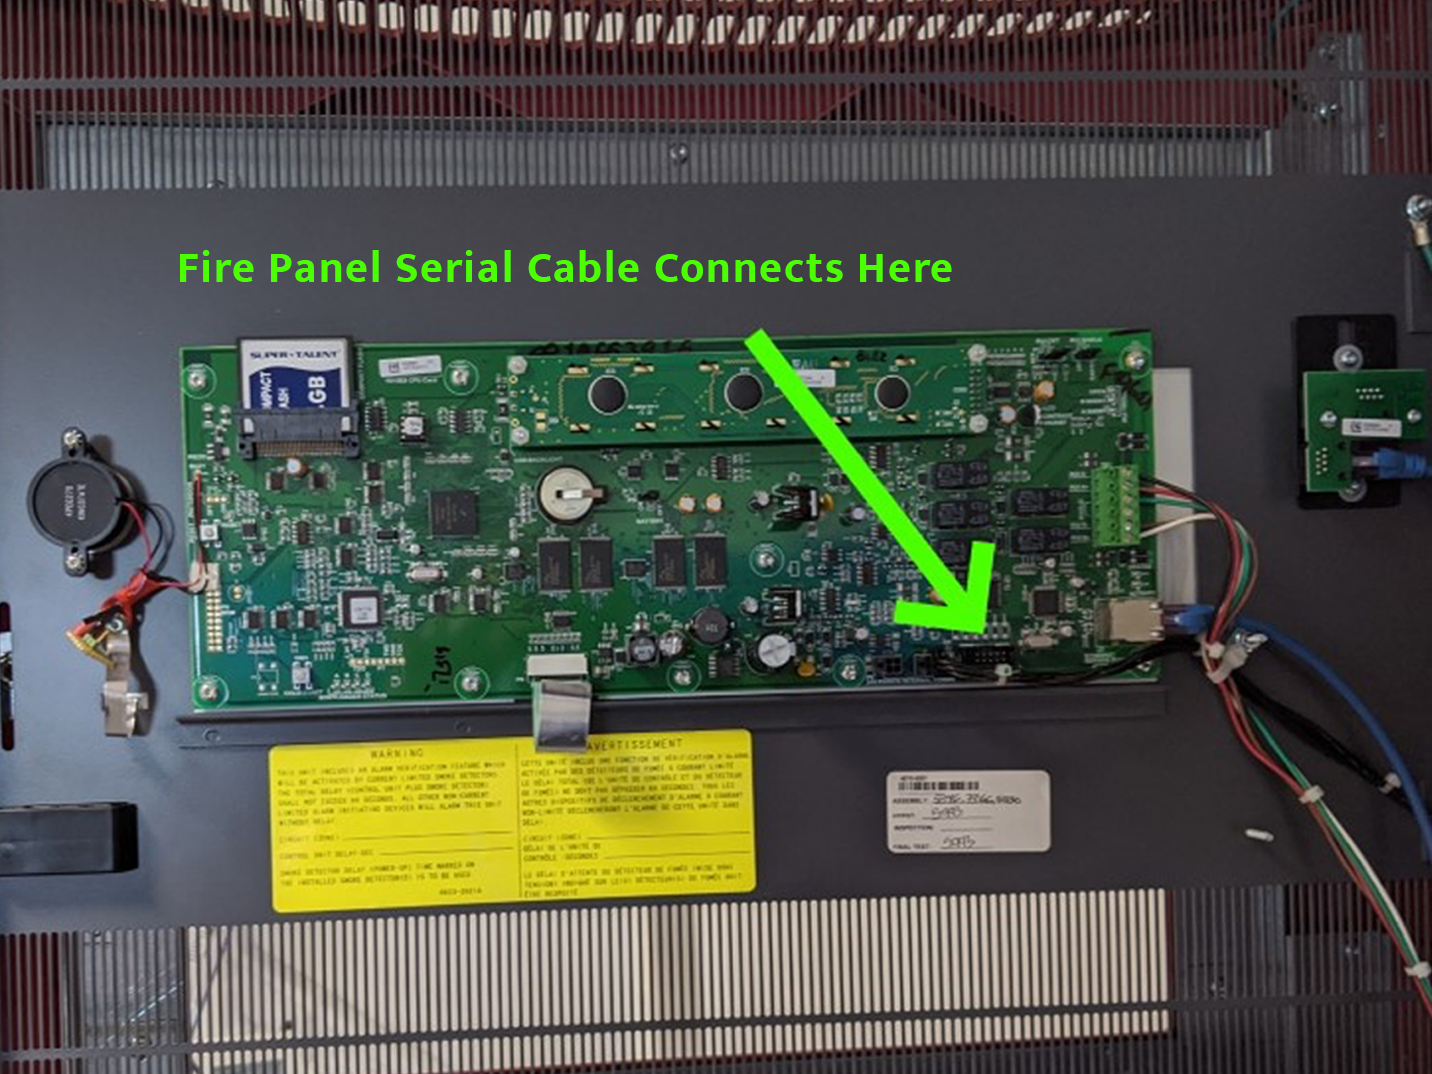
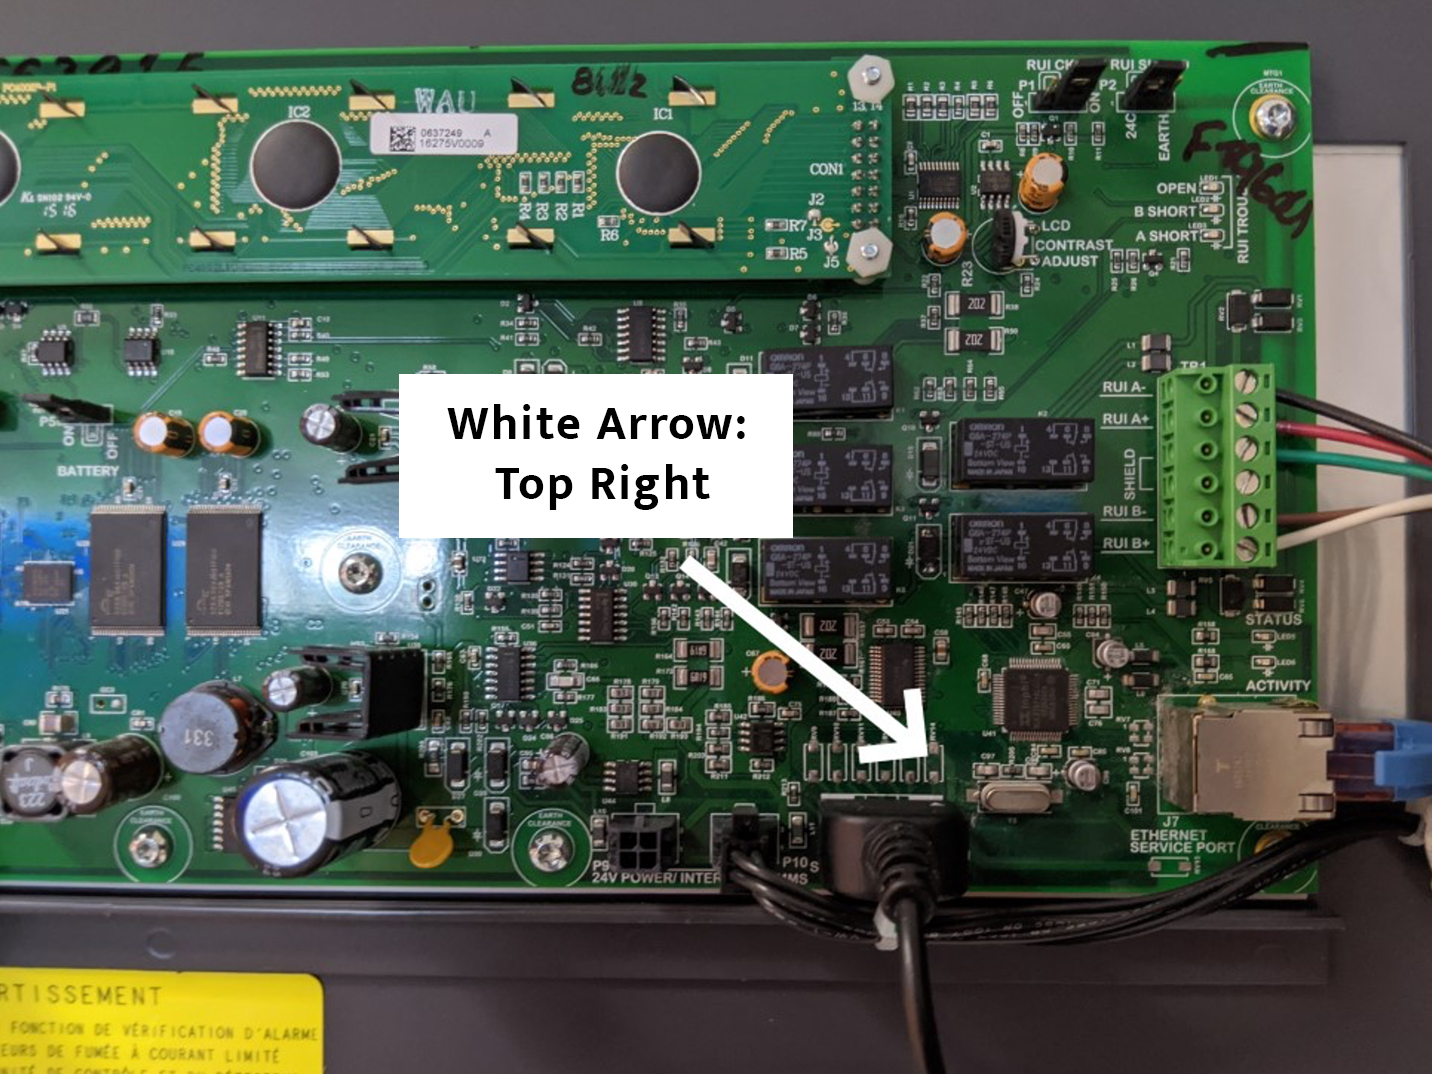
4007ES
|
|
The fire panel serial cable has a white arrow on the connector to the panel itself. It is important to line this up correctly. Figures 2a and 2b show the connection to a 4007ES. In this case, the connector plugs into a circuit board behind the front panel of the FACP. The white arrow should be on the top right of the connector when plugging it in.
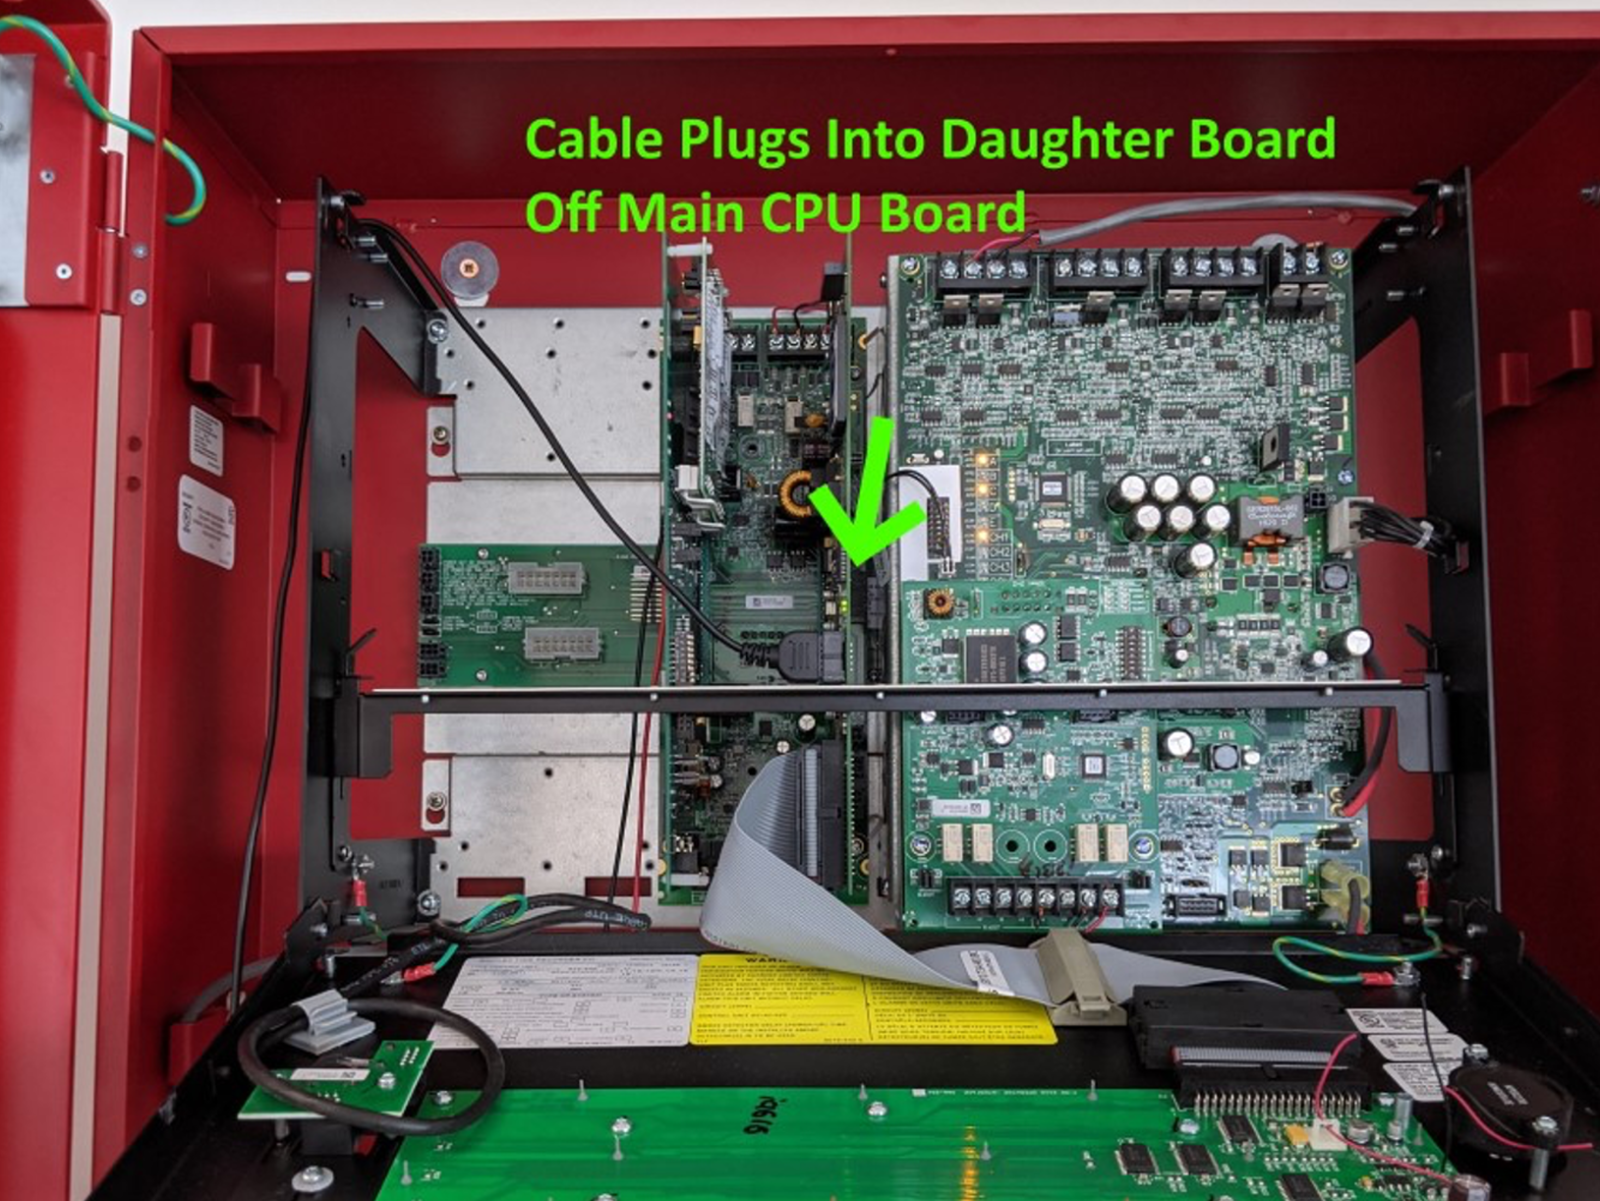
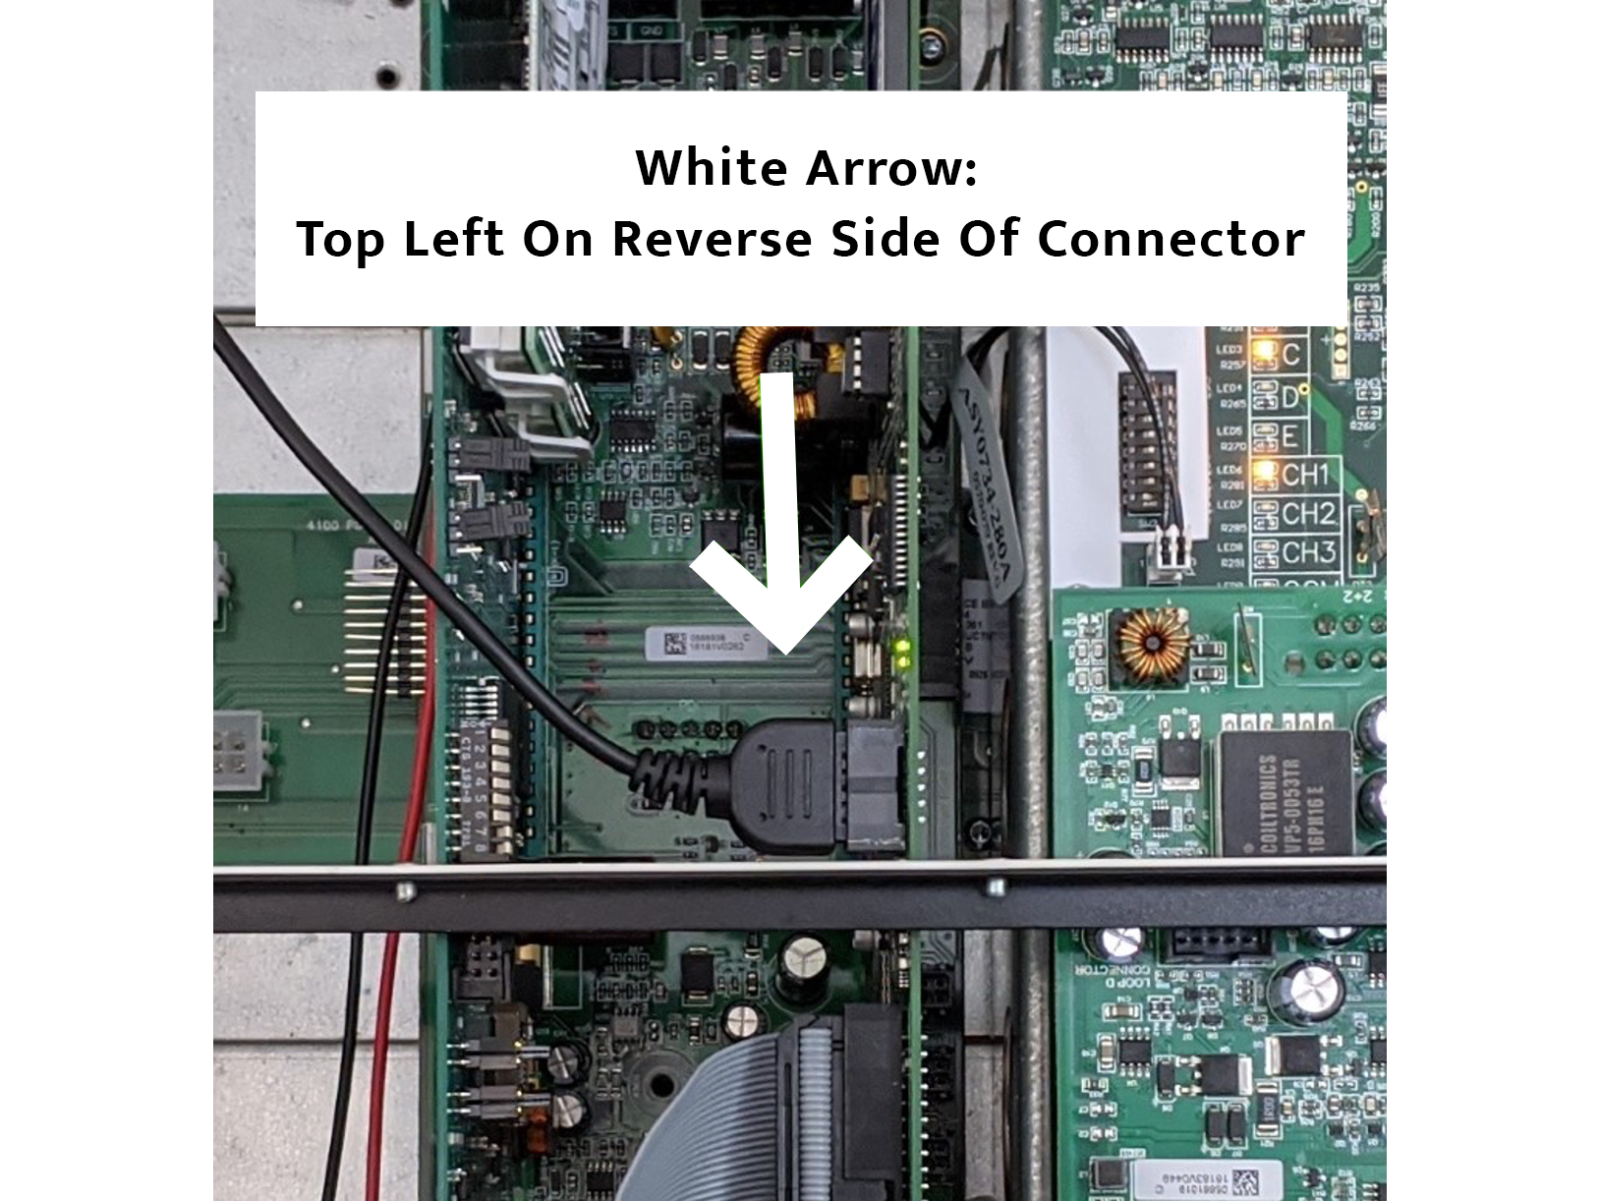
4100ES
|
|
In the case of the 4100ES (see Figures 3a & 3b), the connector plugs into a daughter board of the main CPU board. The white arrow should be on the top left on the reverse side of the connector when it is inserted, i.e. the arrow should not be visible from the front. Take care when inserting the connector as the daughter board can sometimes be held in place quite loosely.
4010ES
|
|
Figures 4a & 4b show the connection to a 4010ES. In this case, the connector plugs into a circuit board behind the front panel of the FACP. The white arrow should be on the top right of the connector when plugging it in.