The gateway can be used in conjunction with the mobile application to perform certain inspections.
Before you get started make sure that your gateway is connected to the panel as well as the Xaap cloud (for more information click here).
You can then use the gateway to pull inventory from the panel, test addressable devices, and send commands back to the panel (scroll down to see the list of all available panel commands). The inventory and results of the inspection are all saved to the Xaap cloud service. They are accessible through the mobile application and can be used to generate reports.
Creating your Inspection
Open the Xaap application on your mobile device and follow the steps below:
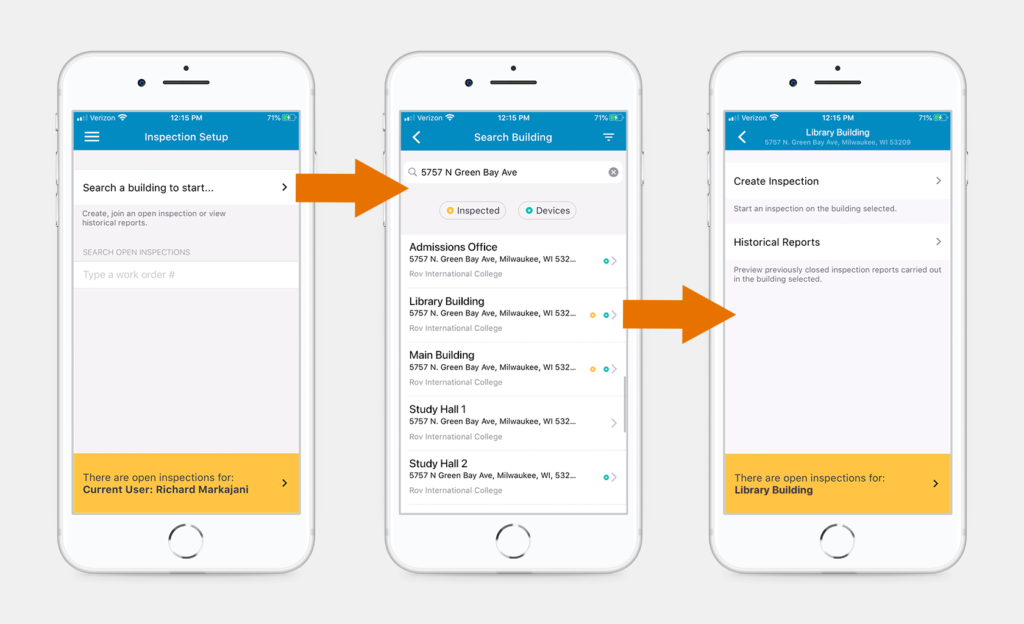
- Click on ‘Search a building to start’.
- Type in the building name or address and select it from the list of results.
- Click ‘Create Inspection’.

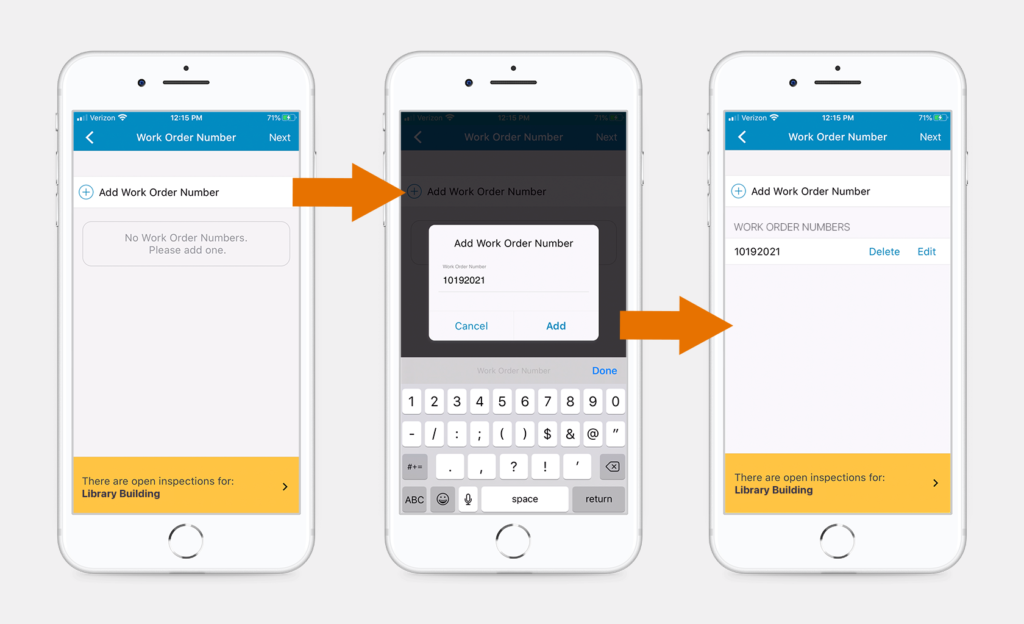
- Add a Work Order Number, then click ‘Next’ in the top right corner of the screen.
- Select the inspection type and the frequency.
- In the Inspection Preview screen, click ‘Create’ in the top right corner.
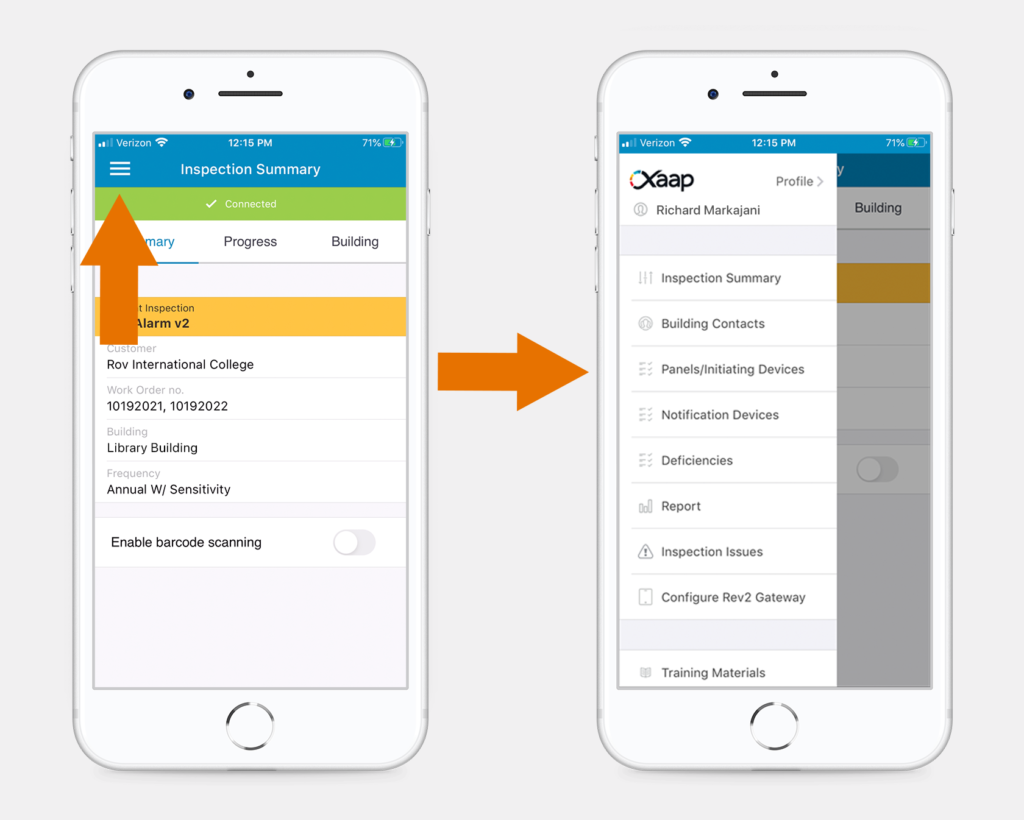
- In the Inspection Summary screen, click the ‘Menu’ icon, in the top left corner. Then, select ‘Panels/Initiating Devices’ from the menu.

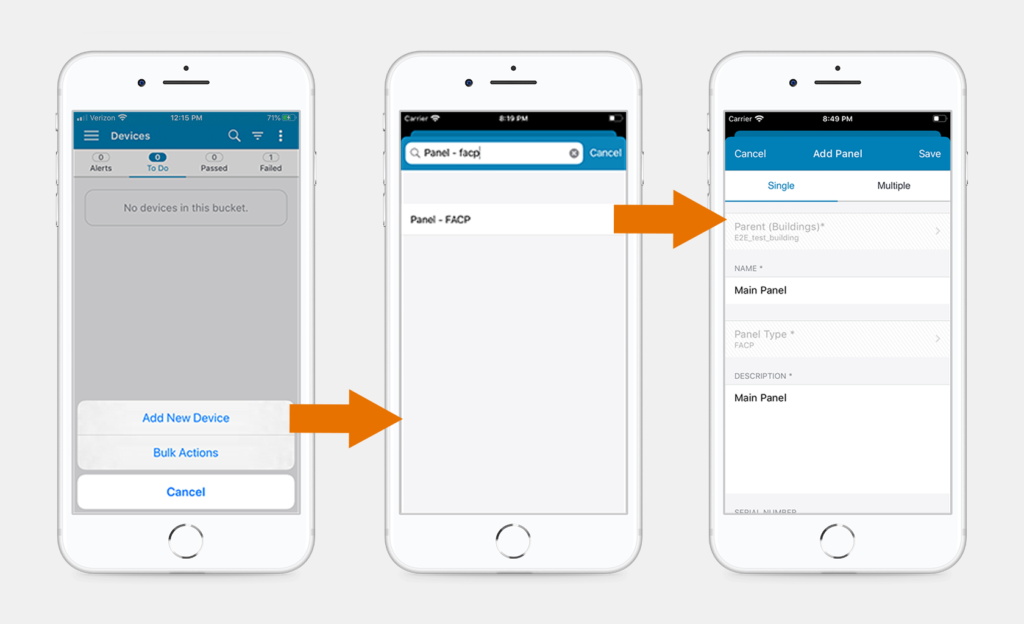
- Click the three dots in the top right corner and then click ‘Add New Device’.
- Search for and select ‘Panel – FACP’. Then, click ‘Next’.
- Fill in all required panel details, then click ‘Save’ in the top right corner. Make sure that the serial number you enter is correct, otherwise you will not have access to the panel commands!

Using the Gateway
- Click the menu icon in the top left corner and select the option ‘Use Gateway’.
- Click ‘Use’ next to the gateway you wish to use in your inspection.
- If the gateway is offline, click ‘Configure’ and follow the steps outlined in this article.
- If the panel is offline, follow the steps outlined here to connect the gateway to the panel.
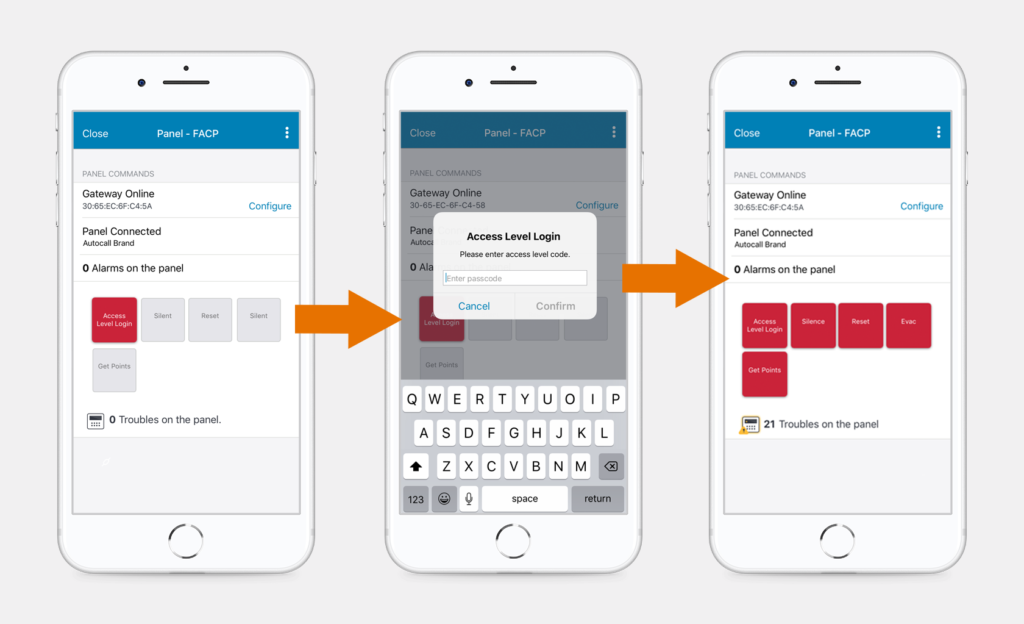
- In the next screen, you will find all available panel commands. Click the ‘Access Level Login’ command and type in the passcode to raise the access level to level 4. This will enable all other commands.
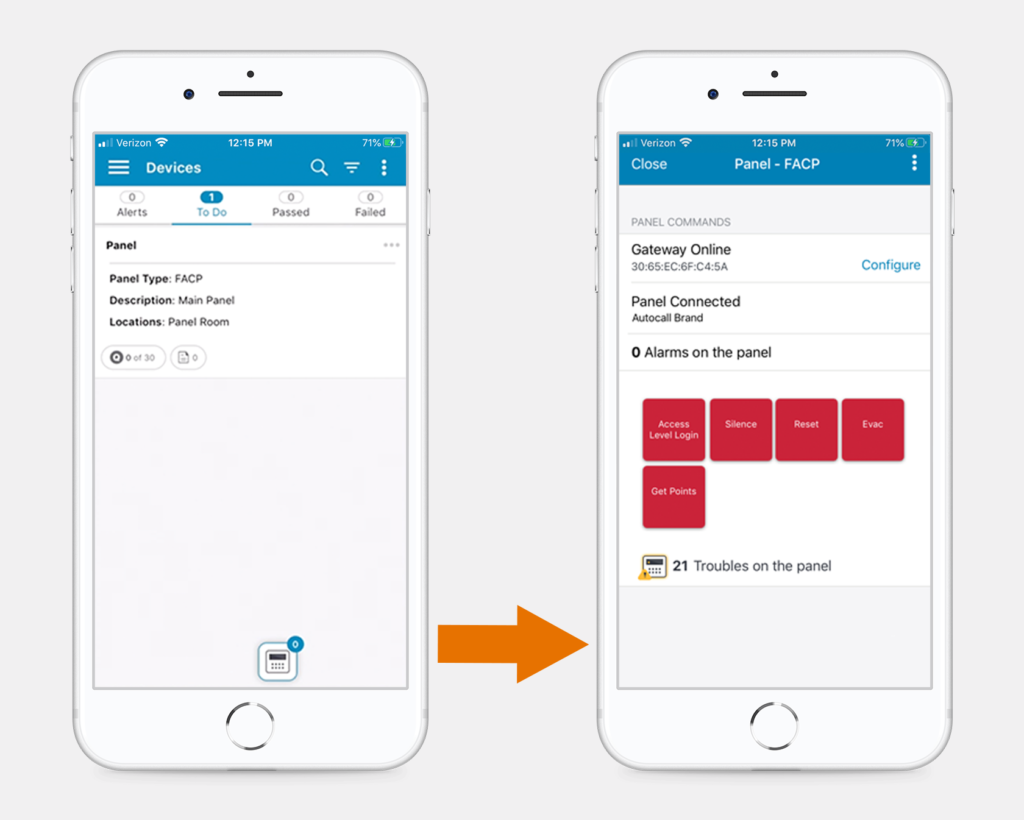
- Once the access level has been raised, you can access all available panel commands, either directly via this screen, or anywhere in your inspection by clicking the panel icon at the bottom of the screen. (Please note, that this icon will only appear if the gateway is connected, the panel is connected and the panel serial number exists within this inspection.)

Available Panel Commands
While the gateway is connecting the panel to Xaap, there are a number of different commands you can send to the FACP:
- Reset – carries out a system reset and clears active alarms on the panel (we recommend resetting the alarms before the number of active alarms reaches 15, or the panel assumes there is a real fire and triggers alerts accordingly)
- Silence – silences the panel alarm signals
- Access Level – allows you to change the user access level (you will need to raise it to level 4, before any other command can be sent to the panel)
- EVAC – in case of an emergency; exits test mode and triggers the evacuation switch on the panel *
- Get Points – pulls inventory from a panel so the devices can be tested using the Xaap mobile application
* Please note, do not rely exclusively on the Xaap-Gateway EVAC command as your sole means of dealing with an emergency situation. We recommend the following testing guidelines:
- Establish a process with the customer to activate a general alarm in the event that a fire emergency
occurs during the testing. - Notify the customer in advance that you will be performing and verifying services through the use
of a handheld mobile application. - Ensure that the people in the area being serviced are aware that the system is undergoing tests
and know the site requirements for reporting a fire emergency during this period. - Ensure that the people in the area being serviced are notified when the tests are complete and
when the system is running normally again.
Executing Panel Commands
Let’s look at an example:
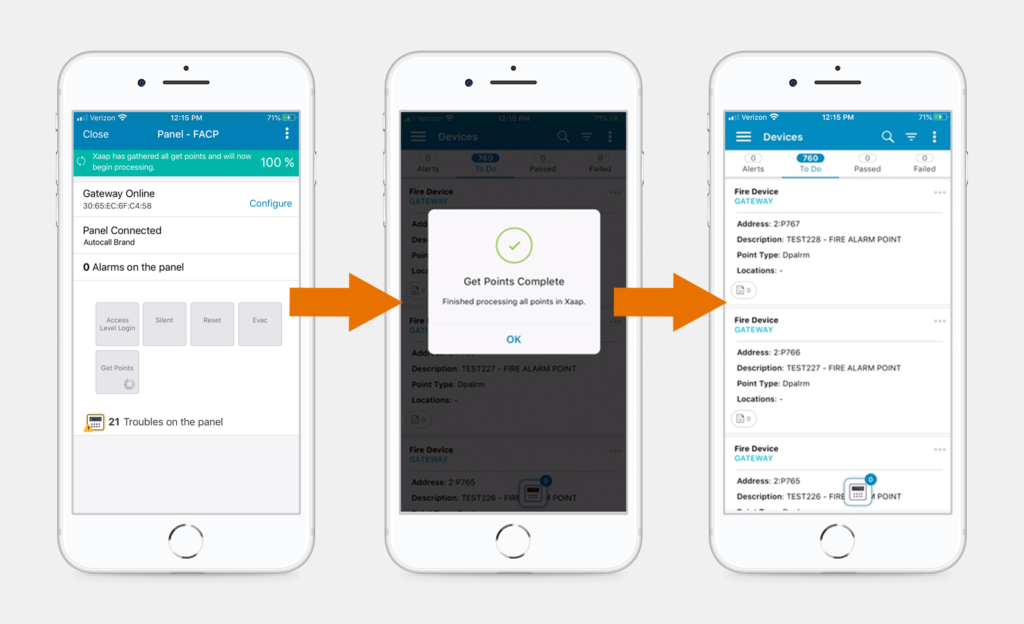
- Once the access level has been raised, click the ‘Get Points’ command. Then, click ‘OK’ in the confirmation modal.
- All panel devices will be pulled from the panel and added to your To-Do bucket. It might take up to 20 minutes, depending on the size of your system, and you can track the progress in the green banner at the top of your screen.
- You will be notified once the process is complete. Click ‘OK’ and start your inspection!